Panoramic Radiograph Guide: Safe, Advanced Dental Imaging
We are seeing big changes in dental care with panoramic radiograph machines. These machines let doctors take full pictures of the mouth in one shot. This has changed dentistry a lot.Guide to the operation, features, and safety of a Panoramic radiograph machine (Panorex).
Using a digital panoramic radiograph helps doctors take better care of patients. It also makes their work easier. These machines are a big step forward in dentistry.
Key Takeaways
- Panoramic radiograph machines capture the entire mouth in a single image.
- They provide a comprehensive view of the oral cavity.
- Digital panoramic radiographs enhance patient care and clinical workflows.
- These machines represent a significant advancement in modern dentistry.
- They enable practitioners to make more accurate diagnoses and develop effective treatment plans.
The Fundamentals of Panoramic Dental Imaging
Panoramic dental imaging has changed how we look at oral health. It shows the whole mouth in one picture, including teeth, jaws, and more.
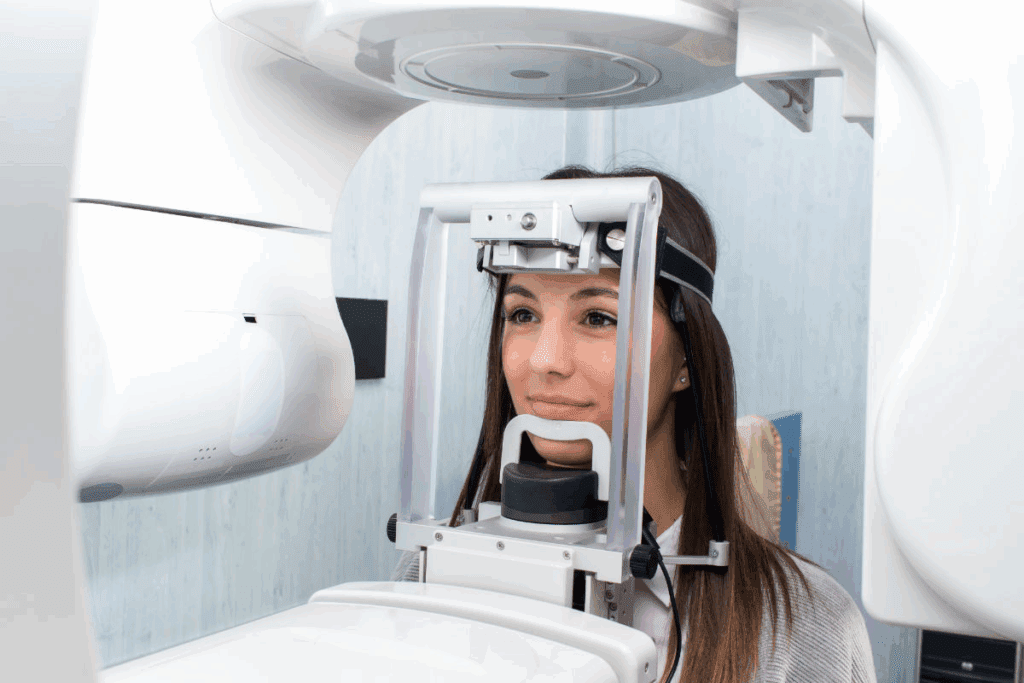
We use panoramic radiography to get detailed images of the mouth. This method uses a rotating arm with an X-ray source and a digital sensor. The patient’s head is in the middle.
How Panoramic Technology Captures Comprehensive Oral Images
Panoramic technology makes detailed images of the mouth. The X-ray source and digital sensor move around the head. They gather data to make a panoramic image.
- The X-ray source sends a beam through the patient’s mouth.
- The digital sensor catches the beam and turns it into an electronic signal.
- The signal is then processed to create a detailed panoramic image.
Advantages of Digital Panoramic Systems Over Traditional Film
Digital panoramic systems have many benefits over old film systems. These include:
- Reduced Radiation Exposure: Digital systems need less X-ray radiation, making them safer.
- Instant Image Availability: Digital images are ready right away, helping with quicker diagnosis and planning.
- Enhanced Image Quality: Digital images can be improved and adjusted for better views of the mouth.
Dental professionals can make more accurate diagnoses and plans with these benefits. This leads to better care for patients.
Understanding Your Panoramic Radiograph Machine Components
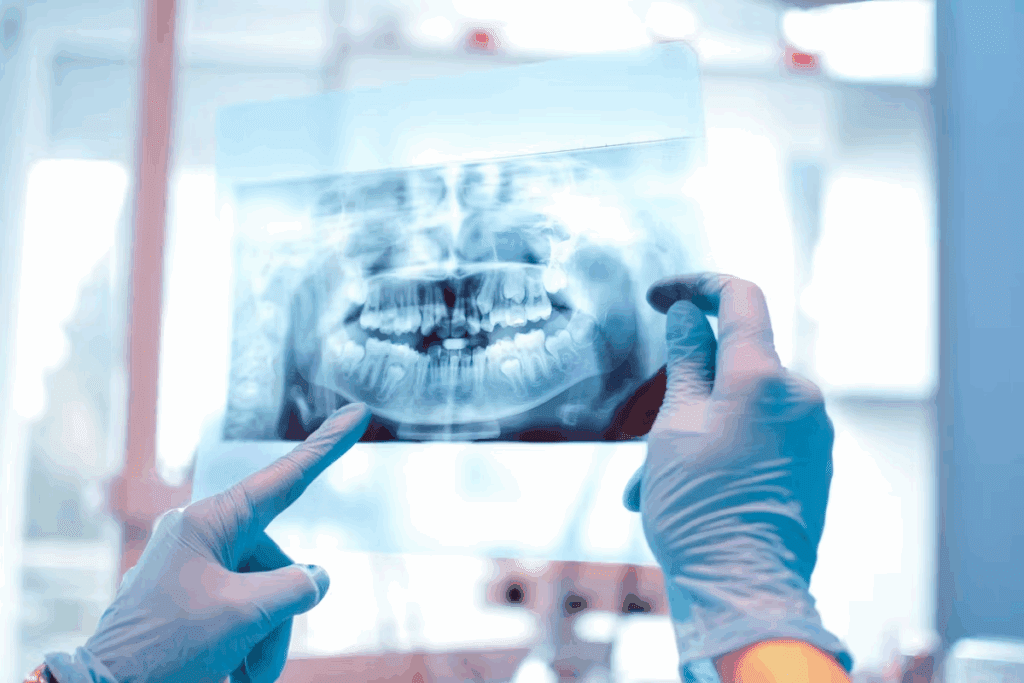
To use a panoramic radiograph machine well, knowing its parts is key. It has two main parts: the X-ray tubehead and the image receptor. These work together to make images.
X-ray Source and Digital Sensor Technology
The X-ray source sends out X-rays that go through the patient’s mouth to make an image. Today’s machines use digital sensor technology for better images and less radiation. These sensors turn the X-ray image into digital data that can be improved with special software.
Rotating Arm Mechanism and Movement Patterns
The rotating arm is vital for moving the X-ray source and image receptor around the patient’s head. It follows a path to capture a wide view of the mouth, including teeth and jaws. The arm’s precise movement makes sure the image is clear and not distorted.
Control Panel and Software Interface Overview
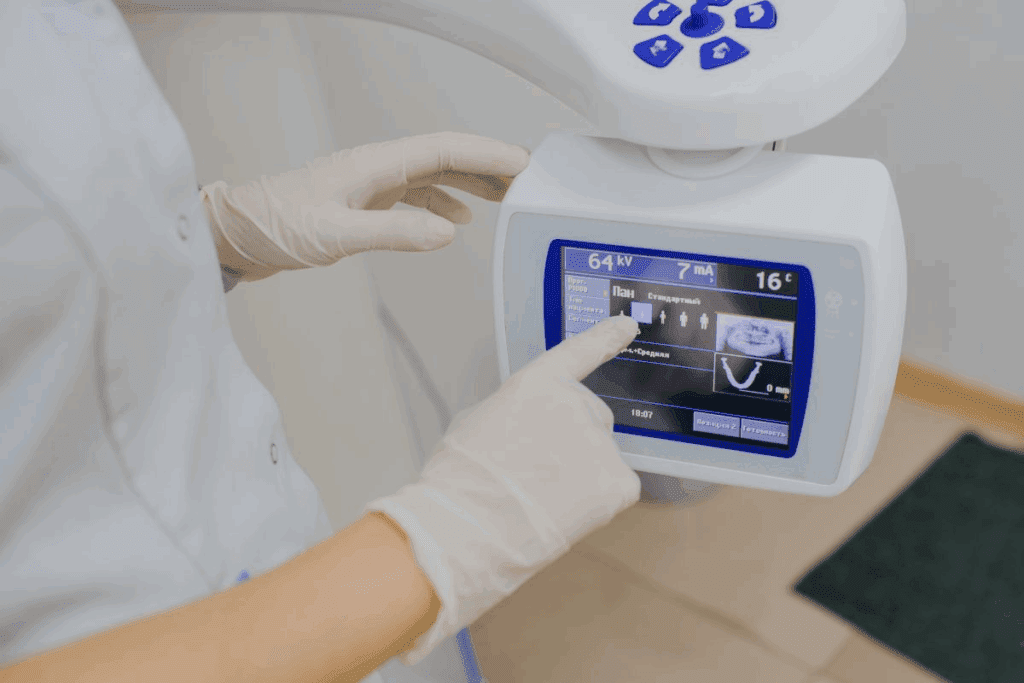
The control panel and software make it easy for users to adjust settings and take images. Modern machines have simple software that helps from start to finish. The panel lets you tweak settings like kVp and mA to get the best image for each patient.
| Component | Function | Key Features |
|---|---|---|
| X-ray Source | Emits X-rays for imaging | Adjustable kVp and mA settings |
| Digital Sensor Technology | Captures X-ray image digitally | High-resolution imaging, reduced radiation |
| Rotating Arm Mechanism | Moves X-ray source and receptor around patient’s head | Precise control for clear, undistorted images |
| Control Panel and Software | Adjusts settings, captures, and processes images | User-friendly interface, image enhancement capabilities |
Pre-Operation Setup and Machine Calibration
The quality of panoramic radiography depends a lot on the setup and calibration before use. It’s key to get the machine right for clear images that help in accurate diagnosis.
Daily Startup Procedures and System Checks
Before starting the panoramic radiograph machine, we do daily checks. This makes sure it works well. Here’s what we do:
- Turn on the machine and wait for it to start up fully
- Look for any error messages or warning signs
- Do a self-test if the machine has this feature
- Check that all mechanical parts are working right
These steps help find problems early to keep image quality high.
Software Initialization and Patient Data Management
Once the machine is on and checked, we start the software and manage patient data. This means:
- Choosing the right software for panoramic images
- Entering patient info correctly for easy access later
- Picking the right settings for the patient’s age and size
Good patient data management keeps records organized and ensures safety.
| Procedure | Purpose | Frequency |
|---|---|---|
| Machine Self-Test | Checks if everything mechanical and electronic is okay | Daily |
| Software Initialization | Gets the system ready for imaging | Daily/Per Use |
| Patient Data Entry | Keeps patient records in order | Per Patient |
By sticking to these steps, we make sure our panoramic radiograph machine gives us top-notch images every time.
Preparing Patients for Panoramic X-ray Procedures
To get the best results from panoramic X-rays, it’s key to prepare patients well. Good preparation makes the images clearer and makes the experience better for the patient.
Removing Metallic Objects and Dental Appliances
Removing metal items and dental appliances is a big part of getting ready for a panoramic X-ray. We tell patients to take off jewelry, glasses, and some dental work. This stops problems that could mess up the X-ray pictures.
Providing Clear Instructions to Reduce Movement Artifacts
It’s important to tell patients how to stay calm and not move during the X-ray. We give them clear steps on how to sit and stay quiet. This helps avoid blurry pictures that can hide important details.
Special Considerations for Pediatric, Geriatric, and Anxious Patients
Some patients need extra help to feel comfortable and get good results. Kids get simple explanations and extra help to stay calm. Older patients might need help sitting right or more time to understand what to do. Anxious patients get extra support to relax.
By thinking about each patient’s needs and adjusting our approach, we make the experience better. This also helps make the X-ray pictures clearer and more useful.
Mastering Patient Positioning for Optimal Imaging
Getting patient positioning right is key for the best imaging results. It’s important for getting clear and useful images. When taking panoramic radiographs, the patient stands or sits with their chin on a chin support. A bite block is used to keep the jaw steady.
Bite Block Placement and Proper Occlusal Plane Alignment
The bite block is a key part of good patient positioning. It keeps the jaw stable and aligns the occlusal plane right. To do this, place the bite block between the teeth and tell the patient to bite gently but firmly.
Getting the occlusal plane right is important for a good panoramic radiograph. The plane should be parallel to the floor. The patient’s head should be set so the Frankfort plane is also parallel to the floor. This makes sure the image is clear and shows the dental anatomy well.
Head, Neck, and Spine Positioning Techniques
It’s not just about the bite block. The head, neck, and spine need to be positioned right too. The midsagittal plane should be perpendicular to the floor, and the Frankfort plane parallel. The neck and spine should be straight, without tilting or rotation.
To get this right, the patient should stand or sit straight and look forward. Their chin should rest on the chin support, and the bite block should be in place. This ensures a clear and accurate image.
Identifying and Correcting Common Positioning Errors
Even with careful planning, positioning errors can happen. Common mistakes include tilting the head, wrong bite block placement, and patient movement during the shot. It’s important to check the image carefully to spot these errors.
If you find an error, reposition the patient and retake the image. Knowing common mistakes and how to fix them helps dental professionals get top-notch panoramic radiographs. These images are vital for making accurate diagnoses.
Step by Step Operation of Panoramic Radiograph Machines
To get clear oral images, we need to follow a specific process with panoramic radiograph machines. This process includes key steps for top-notch diagnostic pictures.
Setting Appropriate Exposure Parameters Based on Patient Factors
Getting the right exposure settings is key for quality images. We look at the patient’s age, size, and dental details to set the right levels. Adjusting the kilovoltage (kVp) and milliamperage (mA) helps balance image quality and radiation.
For kids or those without teeth, we adjust settings differently. We aim to use less radiation while keeping image quality high.
Executing the Scanning Sequence Correctly
The scanning sequence rotates the X-ray source and detector around the patient’s head. The machine rotates 180 degrees to get a full view of the mouth. We make sure the patient stays put and is in the right spot.
Monitoring Equipment and Patient During the Exposure Cycle
It’s vital to watch both the machine and the patient during scanning. We check for any issues and make sure the patient is okay. Talking to the patient before and during helps them relax and stay steady.
By sticking to these steps and focusing on both patient care and image quality, we can make panoramic radiograph machines work their best. This leads to top-notch dental imaging.
Digital Image Processing and Enhancement Techniques
Digital image processing has changed dental radiography a lot. It lets doctors improve image quality and make diagnoses better. Modern systems give instant results and clear images.
We use digital image processing to tweak settings that affect how well images are seen. We adjust contrast, brightness, and density to get the best view.
Adjusting Contrast, Brightness, and Density for Optimal Visualization
Changing image settings is key to seeing important details. For example, changing contrast helps spot different tissue types. Brightness makes the whole image clearer.
- Contrast adjustment helps in distinguishing between hard and soft tissues.
- Brightness adjustment improves the overall image visibility.
- Density adjustment is critical for identifying specific anatomical features.
Using Software Tools to Highlight Specific Anatomical Structures
Advanced software is very important in digital image processing. It lets us zoom in, measure, and apply filters to make images better.
Some important software tools are:
- Zoom and pan tools for detailed examination.
- Measurement tools for assessing anatomical dimensions.
- Filters for reducing noise and making images clearer.
Image Storage, Transfer, and Integration with Practice Management Systems
Storing and transferring images well is key for working with practice management systems. Digital images are kept in special databases. This makes it easy to find and compare them later.
We make sure our systems work well with different practice management software. This makes our workflow more efficient.
“The integration of digital image processing with practice management systems has significantly streamlined our diagnostic workflow, allowing for more accurate and efficient patient care.”
By using these digital image processing and enhancement methods, we can greatly improve patient care. We make diagnoses more accurate and care better.
Implementing Radiation Safety Protocols
Radiation safety is key for protecting patients and operators in panoramic radiography. We focus on safe use of panoramic radiograph machines to cut down on radiation exposure.
Operator Protection Measures and Positioning
We keep a safe distance from the X-ray source to protect the operator. Lead aprons and thyroid shields are not needed for the operator but must be ready for patients. The operator should stand behind a lead-lined barrier or in a safe area to lower exposure.
Keeping equipment in good shape is also vital. Regular checks ensure the panoramic radiograph machine works right, reducing radiation leaks.
Minimizing Patient Radiation Exposure Through Proper Techniques
We use the right technique and patient positioning to cut down radiation for patients. We make sure the patient’s head is in the right spot using the machine’s guides and light beams. This limits the X-ray beam to just the needed area, reducing exposure.
Choosing the right exposure settings for the patient’s size and type is also key. Modern panoramic radiograph machines often have automatic exposure control systems to optimize the dose.
| Patient Category | Exposure Setting | Additional Measures |
|---|---|---|
| Pediatric | Lowest dose setting | Thyroid shield |
| Adult | Standard setting | Lead apron optional |
| Geriatric | Adjusted for bone density | Lead apron |
Regulatory Compliance and Documentation Requirements
We follow local and national rules on radiation safety. This includes regular checks on our equipment and keeping records of maintenance and quality control.
Patient records must have details of the radiographic exam, including the dose and safety steps taken. This is key for following rules and keeping patients safe.
By sticking to these safety protocols, we create a safe space for both patients and staff. This reduces the risks of panoramic radiography.
Troubleshooting and Maintenance of Panoramic Radiograph Equipment
To get top-notch images and make your equipment last longer, regular upkeep is key. Panoramic radiography is a must-have in dental offices. It’s essential for precise patient checks.
Resolving Common Image Quality Issues
Image quality problems can really hurt the value of panoramic radiographs. Issues like:
- Blurry or distorted images
- Insufficient contrast
- Artifacts from patient movement
To fix these, we need to find out why they happen. For example, blurry images might be from wrong patient placement or X-ray source problems. Fixing the patient’s position and checking the X-ray source often solves these issues.
Addressing Technical Malfunctions and Error Messages
Technical problems can mess up dental office work. Common machine errors might show:
- Sensor malfunction
- Software bugs
- Mechanical breakdowns
For these, check the manual or call the maker’s support. Keeping software up-to-date and handling the equipment right can stop many problems.
Preventive Maintenance Schedule and Best Practices
Having a regular maintenance plan is vital. It keeps your equipment running smoothly and for longer. Important tasks include:
| Maintenance Task | Frequency | Responsible Personnel |
|---|---|---|
| Cleaning the X-ray source and sensor | Daily | Radiology technician |
| Software updates | Quarterly | IT department |
| Mechanical inspection | Bi-annually | Manufacturer’s service technician |
By sticking to this schedule and following best practices, your panoramic radiograph equipment will stay in top shape. This ensures high-quality images and helps in better patient care.
Conclusion: Optimizing Panoramic Radiography in Modern Dental Practice
We’ve looked into the basics and how to use panoramic radiograph machines. They are key in today’s dental care. Knowing how to use them well helps us get better at diagnosing and caring for patients. Panoramic X-rays give a full view of the mouth, showing things that regular X-rays can’t.
To get the most out of panoramic radiography, we need to learn about patient setup, setting the right exposure, and processing digital images. It’s also important to follow safety rules and keep the machines in good shape. This way, we can use panoramic X-rays to make dental treatments better and more effective.
Frequently Asked Questions
What is a panoramic radiograph machine, and how does it work?
A panoramic radiograph machine, or pano, captures a wide X-ray image of the jaw. It rotates around the patient’s head to take the image. This is done with a digital sensor or film.
What are the benefits of using a digital panoramic radiograph machine?
Using a digital panoramic radiograph machine has many benefits. It reduces radiation and makes images available right away. The image quality is also better. Plus, it’s easy to store and share images.
How do I prepare a patient for a panoramic X-ray procedure?
To prepare a patient, remove any metal items like jewelry or glasses. Also, take out dental appliances. Give clear instructions to stay calm and not move during the procedure. Consider special needs for kids, seniors, or nervous patients.
What are the key components of a panoramic radiograph machine?
The main parts of a panoramic radiograph machine include the X ray source and digital sensor. There’s also a rotating arm and a control panel with software. These parts work together to get high-quality images.
How do I ensure proper patient positioning for a panoramic X ray?
To position a patient right, use a bite block to align the jaw. Adjust the head, neck, and spine correctly. Watch out for tilting or rotation errors and fix them.
What are the radiation safety protocols for operating a panoramic radiograph machine?
For radiation safety, wear protective gear like lead aprons. Stand behind a shielded wall or use a remote control. Use proper techniques to reduce patient exposure and follow rules and documentation.
How do I troubleshoot common issues with panoramic radiograph machines?
To fix common problems, check the machine’s calibration and software. Issues like image quality or technical malfunctions can happen. Look at the user manual or call the manufacturer’s support for help.
What is the importance of maintaining panoramic radiograph equipment?
Keeping equipment in good shape is key for its performance and life. Have a maintenance plan and fix issues quickly. This way, you get high-quality images and avoid downtime.
How do I optimize digital image processing and enhancement for panoramic radiographs?
To improve digital images, adjust contrast, brightness, and density. Use software to highlight important parts. Make sure to store and share images properly.
What are the advantages of panoramic radiography in modern dental practice?
Panoramic radiography has many benefits. It gives a full view of the mouth, uses less radiation, and is more accurate. It’s a vital tool for dentists to diagnose and treat patients better.


