

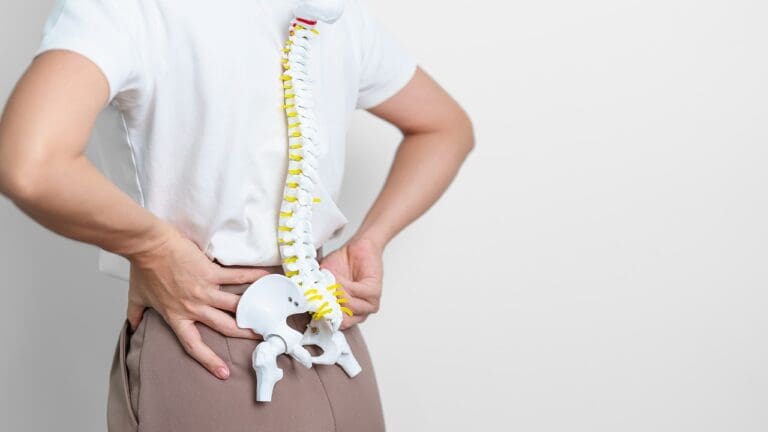
Recovering from hip surgery is a big step. It’s important to know the recovery process well. Nearly 1 million hip replacement surgeries are performed annually in the United States alone. This shows how vital clear post-operative care guidelines are.
Find out when can you use a regular toilet after hip replacement and get amazing tips for a safe and powerful recovery at home today.
Patients often wonder about using recliners and moving to regular toilets during their hip replacement recovery timeline. We’ll cover these topics, giving you detailed hip replacement recovery guidelines to help you on your path.
Key Takeaways
- Understanding the hip replacement recovery process
- Guidelines for using a recliner after hip arthroscopy
- Timeline for transitioning to a regular toilet
- Tips for a smooth and safe recovery
- Importance of following hip replacement recovery guidelines
Understanding Different Hip Surgeries and Their Recovery Requirements

It’s important to know about the different hip surgeries to help patients understand what to expect. Hip surgeries can be divided into two main types: hip arthroscopy and hip replacement. Each has its own benefits and recovery needs.
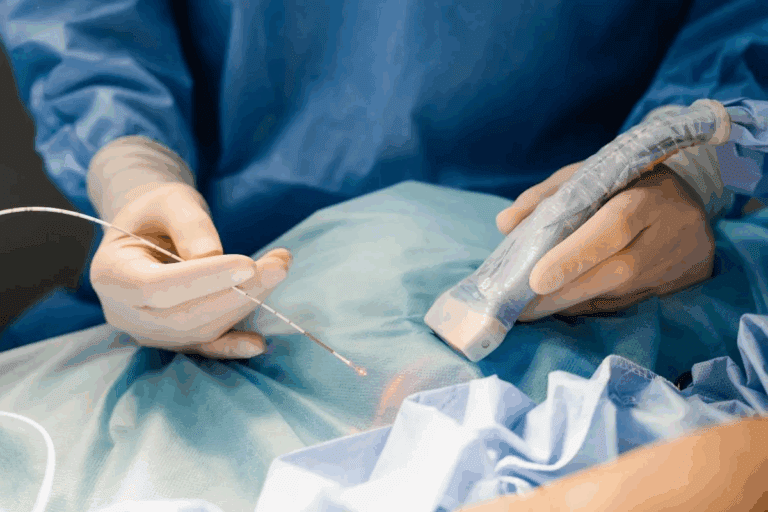
Hip Arthroscopy: Procedure and Initial Recovery
Hip arthroscopy is a small surgery that uses a camera and tools to fix hip problems. This surgery can repair cartilage, remove bone spurs, or treat hip impingement. Right after the surgery, patients need to rest, use ice, and compress to reduce pain and swelling.
People who have hip arthroscopy usually recover quickly. They can get back to their usual activities in a few weeks. But, it’s key to follow the doctor’s advice to heal properly and avoid problems.
Hip Replacement: Procedure and Initial Recovery
Hip replacement surgery, or hip arthroplasty, replaces the damaged hip with an artificial one. This is usually for those with severe arthritis or who haven’t gotten better with other treatments. The first few weeks after surgery are all about managing pain, swelling, and getting back to moving.
Right after surgery, patients have to follow certain rules to avoid dislocation and help their hip heal. This includes avoiding certain positions, using aids, and doing gentle exercises.
Key Differences in Mobility Restrictions

The mobility rules after hip surgery vary between hip arthroscopy and hip replacement. Hip arthroscopy patients usually have fewer restrictions than those who had hip replacement. Hip replacement patients need to be more careful to avoid dislocation.
- Hip arthroscopy patients can get back to normal activities in weeks.
- Hip replacement patients have to follow strict rules for several weeks to months.
- Both surgeries need careful care after to ensure the best recovery.
Knowing these differences helps patients set realistic goals and follow the right recovery plan. By listening to their doctor and taking the right steps, patients can get the best results from their surgery.
The Critical Importance of Proper Positioning After Hip Surgery
Proper positioning after hip surgery is key to avoiding problems and getting the best results. After surgery, the body is more at risk for injury and complications. Following specific care guidelines is important to reduce risks and aid in recovery.
Hip Precautions and Movement Restrictions
Patients after hip surgery must follow certain hip precautions and movement limits. These steps help prevent dislocation and aid in healing. They include not bending the hips too far, not crossing legs, and not twisting.
“Adherence to hip precautions is a critical component of post-operative care following hip replacement surgery. By avoiding certain movements, patients can significantly reduce their risk of dislocation and other complications.”
The 90-Degree Rule and Hip Flexion Limitations
Patients are often told to follow the 90-degree rule. This means not bending the hips more than 90 degrees. It’s important because bending too much can cause dislocation or strain the surgical area.
- Avoid bending at the hips beyond 90 degrees.
- Use assistive devices like grabbers to pick up items from the floor.
- Choose chairs with higher seats to avoid deep bending.
How Improper Positioning Can Affect Surgical Outcomes
Improper positioning after hip surgery can lead to serious issues. Dislocation is a major risk if the patient bends or moves in ways that stress the new hip joint. It can also cause muscle strain, leading to pain and a longer recovery.
|
Risk |
Description |
Prevention Measure |
|---|---|---|
|
Dislocation |
Occurs when the hip joint is improperly aligned, causing the ball to slip out of the socket. |
Adhere to hip precautions and avoid bending beyond 90 degrees. |
|
Muscle Strain |
Strain on the surrounding muscles due to improper positioning or excessive movement. |
Use assistive devices and follow movement restrictions. |
By following these guidelines, patients can lower the risk of complications and have a smoother recovery. It’s vital for patients to work with their healthcare providers to understand their specific needs.
Can You Sit in a Recliner After Hip Arthroscopy?
After hip arthroscopy, many patients wonder about safe sitting options. The right choice depends on your surgery details and health. Sitting in a recliner can be safe and comfy if done right.
Immediate Post-Surgery Guidelines (Days 1-7)
In the first week after surgery, following certain rules is key for healing. Here are important tips:
- Avoid bending, twisting, or lifting heavy objects.
- Keep your hip in a position that avoids excessive flexion (bending).
- Use a recliner that allows you to maintain a comfortable position with your hip.
Recliners are helpful in these early days. They let you adjust your position to ease discomfort and aid healing.
How Recliners Support Proper Hip Positioning
Recliners are great for keeping your hip in the right position after surgery. By adjusting the recliner, you can:
- Reduce strain on the hip joint.
- Maintain a position that promotes blood circulation.
- Avoid putting direct pressure on the operated area.
Recommended recliner settings are semi-reclined. This keeps your hip neutral or slightly extended, avoiding bending.
Recommended Recliner Settings and Adjustments
To get the most from a recliner after surgery, make these adjustments:
- Adjust the backrest to a comfortable angle that does not cause your hip to flex beyond 90 degrees.
- Use leg rests or pillows to support your legs and maintain a neutral hip position.
- Ensure the recliner is at a height that allows you to stand up and sit down without straining your hip.
By adjusting your recliner and following post-surgery guidelines, you can create a recovery space that supports healing and reduces pain.
Benefits of Using Recliners During Hip Surgery Recovery
Recliners are key for those recovering from hip surgery. They offer many benefits that make recovery easier.
Pressure Relief and Circulation Benefits
Recliners help by reducing pressure on sore areas. They let patients change positions often. This improves blood flow and lowers the chance of sores.
Key benefits include:
- Reduced pressure on surgical sites
- Improved blood circulation
- Enhanced comfort during prolonged sitting
|
Benefit |
Description |
|---|---|
|
Pressure Redistribution |
Recliners allow for frequent position adjustments, reducing constant pressure on sensitive areas. |
|
Circulation Improvement |
Elevating legs and adjusting positions helps promote better blood flow. |
|
Comfort Enhancement |
Recliners provide adjustable support, making sitting more comfortable. |
Assistance with Standing and Sitting Transitions
Recliners help with getting up and sitting down after hip surgery. Their adjustable design makes these movements easier, putting less stress on the hip.
Sleep Quality Improvements in Semi-Reclined Positions
Sleeping in a semi-reclined position can be more comfortable after hip surgery. Recliners support the body in a way that eases hip strain. This can lead to better sleep.
Recliners are vital for hip surgery recovery. They offer pressure relief, help with movement, and improve sleep. As we learn more about recovery, it’s clear recliners are a big help for hip surgery patients.
When Can You Use a Regular Toilet After Hip Replacement?
Knowing when to switch back to a regular toilet after hip surgery is key for a smooth recovery. The path to normal bathroom habits includes several stages and safety measures. These steps help ensure comfort and safety.
Initial Bathroom Restrictions (First 2 Weeks)
Right after surgery, patients should avoid bending, twisting, or flexing their hip beyond 90 degrees. This makes using a regular toilet hard. In the first two weeks, patients often use raised toilet seats or bedside commodes to ease the strain on their hip.
Transitioning Timeline to Regular Toilet Use
The time it takes to start using a regular toilet varies, usually between 2 to 6 weeks after surgery. This depends on the patient’s health, the surgery type, and following post-op instructions.
|
Week |
Bathroom Activity Level |
Assistive Devices |
|---|---|---|
|
1-2 |
Limited mobility, avoid bending |
Raised toilet seat, bedside commode |
|
2-4 |
Gradual increase in mobility |
Possible transition to regular toilet with raised seat |
|
4-6 |
Improved strength and flexibility |
Regular toilet use without assistive devices |
Safe Techniques for Sitting and Standing from Toilet
To safely use a regular toilet after hip replacement, follow these steps:
- Use a raised toilet seat if your doctor recommends it.
- When standing, use the armrests or grab bars to help pull yourself up, keeping your back straight and avoiding bending at the hips.
By understanding initial bathroom restrictions, following a gradual transition, and using safe techniques, patients can face hip replacement recovery with more confidence and safety.
Hip Replacement Recovery Timeline: Bathroom Independence
Knowing how long it takes to recover from hip replacement surgery is key. It helps patients get back to doing things on their own, like using the bathroom. This journey is slow, needing patience, support, and knowing what to expect.
Phase 1: Complete Assistance (Days 1-7)
Right after surgery, patients need help with everything, including the bathroom. This first week is very important. It helps prevent any problems with the surgery site. Caregivers are very important here, helping with moving, cleaning, and managing pain.
Key Challenges:
- Mobility limitations
- Pain management
- Risk of complications such as dislocation or wound infection
Phase 2: Modified Independence (Weeks 2-4)
In the second phase, patients start to do more on their own. They might use walkers or canes and do simple hygiene tasks alone. But, they need help with harder tasks or anything that makes them bend or strain.
Milestones:
- Increased mobility with assistive devices
- Gradual improvement in performing daily activities
- Reduced reliance on caregivers for basic needs
Phase 3: Returning to Normal Bathroom Routines (Weeks 6+)
By the sixth week, most patients have made big strides. They’re working to get back to their usual bathroom habits. They might not need walkers anymore and feel more confident doing things by themselves. But, it’s important to keep following the doctor’s advice and listen to your body to avoid too much strain.
Indicators of Progress:
- Ability to walk without assistive devices
- Increased strength and flexibility
- Confidence in performing daily activities without assistance
Recovery times can vary a lot. Things like health, age, and following doctor’s orders can affect how fast you recover. Knowing about these phases and their challenges can help both patients and caregivers get ready for what’s ahead.
|
Phase |
Timeline |
Key Features |
|---|---|---|
|
Phase 1 |
Days 1-7 |
Complete assistance required, mobility limitations, pain management |
|
Phase 2 |
Weeks 2-4 |
Modified independence, use of assistive devices, gradual improvement in daily activities |
|
Phase 3 |
Weeks 6+ |
Returning to normal routines, increased mobility, confidence in daily activities |
Essential Bathroom Modifications After Hip Surgery
Creating a safe bathroom is key for hip surgery recovery. Making your bathroom more accessible can help a lot. It reduces fall risks and boosts your independence.
Raised Toilet Seats: Types and Installation
Raised toilet seats are a great help. They come in clamp-on and screw-in types. Just make sure to follow the installation guide carefully.
Grab Bars and Safety Rails: Optimal Placement
Grab bars are vital for bathroom safety. Place them near the toilet and in the shower. Make sure they’re installed right to hold your weight.
Toilet Surrounds and Frames: When They’re Necessary
Toilet surrounds and frames add extra support. They’re best for those needing a lot of help. They’re super useful during the early recovery days.
|
Modification |
Purpose |
Key Considerations |
|---|---|---|
|
Raised Toilet Seats |
Eases toilet use by reducing strain on the hip |
Choose between clamp-on and screw-in types; consider height adjustability |
|
Grab Bars and Safety Rails |
Provides support and prevents falls |
Install near toilet and in shower; ensure secure mounting |
|
Toilet Surrounds and Frames |
Offers additional support and stability |
Useful for patients needing significant assistance; consider frame height and width |
With these bathroom changes, patients can feel safer and more independent after hip surgery.
Comparing Seating Options During Hip Surgery Recovery
Choosing the right seat is key for those recovering from hip surgery. It helps avoid pain and complications. The right seat can also affect how well you heal, manage pain, move, and feel comfortable.
Recliners vs. Standard Chairs for Daily Activities
Choosing between recliners and standard chairs is important for daily life after hip surgery. Recliners are often better because they let you adjust your position easily. This reduces strain on your hip and keeps your body in a healing position.
Standard chairs might not be as adjustable or comfy. But, you can add cushions or support to make them better for recovery.
Toilet Seats vs. Bedside Commodes: Pros and Cons
Toilet seats and bedside commodes have different uses during recovery. Toilet seats are important for cleanliness, but they might need extra support or changes, like raised seats.
Bedside commodes are handy, mainly when you can’t move much. They’re close to your bed, making it easier to go without getting up. But, they need to be cleaned and emptied often, which can be hard for caregivers.
- Pros of toilet seats: familiar and easy to use, can be modified with raised seats or grab bars.
- Cons of toilet seats: may require significant effort to use, which can be hard at first.
- Pros of bedside commodes: convenient for patients with limited mobility, reduces the need for walking to the bathroom.
- Cons of bedside commodes: requires regular maintenance, may not be as comfortable as a standard toilet.
Shower Chairs and Bath Benches for Bathroom Safety
Keeping the bathroom safe is key during hip surgery recovery. Shower chairs and bath benches offer vital support, lowering the chance of falls and injuries. They let patients bathe safely without standing for too long.
Shower chairs fit inside the shower, giving a stable seat for bathing. Bath benches go across the bathtub edge, making it easier to get in and out.
Both shower chairs and bath benches are great for bathroom safety during recovery. They make bathing safer and reduce accident risks.
Physical Therapy Exercises to Improve Bathroom and Seating Independence
After hip surgery, patients can benefit from targeted physical therapy exercises. These exercises improve mobility and independence in daily activities. This includes using the bathroom and sitting comfortably.
These exercises help patients regain strength, balance, and confidence. This makes it easier to perform daily tasks safely.
Strengthening Exercises for Safe Transfers
Strengthening the muscles around the hip is key for safe transfers. We recommend the following exercises:
- Leg Press: Using a leg press machine to strengthen the quadriceps, hamstrings, and glutes.
- Straight Leg Raises: Lying on your back and lifting one leg at a time, keeping it straight, to strengthen the hip flexors.
- Clamshell Exercise: Lying on your side with knees bent and lifting the top knee, keeping feet together, to strengthen the hip abductors.
These exercises should be done under the guidance of a physical therapist. This ensures proper form and avoids overexertion.
Balance Training for Bathroom Safety
Balance training is essential for preventing falls, which is important in the bathroom. Surfaces can be slippery. Some effective balance exercises include:
- Single-Leg Stance: Standing on one leg while holding onto a stable object for support.
- Heel-To-Toe Walking: Walking along a straight line, placing the heel of one foot directly in front of the toes of the other foot.
- Balance Boards: Using a balance board or wobble board to improve overall balance and stability.
Balance exercises should be progressed gradually. Start with support and gradually reduce it as confidence and ability improve.
Progressive Mobility Exercises for Sitting and Standing
Improving mobility and the ability to sit and stand safely is key for regaining independence. Progressive mobility exercises include:
- Chair Squats: Standing up and sitting down in a chair without using hands for support.
- Step-Ups: Using a step or a curb to practice stepping up and down, improving strength and coordination.
- Leg Swings: Standing and swinging one leg forward and backward, then switching to the other leg, to improve hip mobility.
|
Exercise |
Purpose |
Repetitions |
|---|---|---|
|
Leg Press |
Strengthen hip muscles |
3 sets of 10 reps |
|
Single-Leg Stance |
Improve balance |
3 sets of 30 seconds per leg |
|
Chair Squats |
Improve sitting and standing ability |
3 sets of 10 reps |
It’s essential to work with a physical therapist. They can tailor these exercises to your specific needs and abilities. This ensures a safe and effective recovery.
Signs You’re Ready to Transition to Regular Toilet Accessibility Post Hip Replacement
Getting back to using the bathroom on your own after a hip replacement is a big step. It’s important to know when you’re ready to stop using bathroom aids. This means checking your physical and emotional health.
Physical Milestones to Achieve Before Removing Aids
Before you can stop using bathroom aids, you need to reach some physical goals. These include:
- Demonstrating improved strength and stability in the affected hip
- Exhibiting a full range of motion without significant pain or discomfort
- Being able to stand and sit without assistance
- Showing balance and coordination sufficient for safe toilet use
Reaching these physical goals shows you’re ready to start using the toilet on your own.
Pain Management Indicators of Readiness
Managing your pain well is also key to being ready for the toilet. You should have:
- Minimal pain during daily activities, including sitting and standing
- A reduction in the need for pain medication
- Improved overall comfort during bathroom activities
When your pain is under control, you’ll feel more confident about using a regular toilet.
Confidence and Safety Self-Assessment Guidelines
Feeling confident and safe is essential when you start using the toilet again. You should:
- Feel confident in your ability to sit down and stand up from the toilet without assistance
- Be able to assess your environment for possible fall hazards
- Demonstrate an understanding of safe transfer techniques
Meeting these criteria helps ensure a smooth transition to using a regular toilet.
Potential Complications from Improper Sitting or Toilet Use
Recovering from hip surgery means knowing how to avoid problems with sitting and using the toilet. These daily tasks need extra care during recovery to avoid serious issues.
Hip Dislocation Risks and Warning Signs
Hip dislocation is a big risk after surgery. It happens when the hip joint moves out of place, often due to bad sitting or bending. It’s key to watch for warning signs, like sudden pain, feeling unstable in the hip, or a leg that looks different.
To lower dislocation risk, avoid bending past 90 degrees, twisting, or crossing your legs. Using a recliner or elevated toilet seat helps keep you in a safe position.
Wound Healing Complications to Monitor
Bad sitting or toilet use can also harm wound healing. Look out for signs like redness, swelling, more pain, or discharge at the surgical site. Keep your wound clean and dry and follow your surgeon’s care advice.
Watching for these signs and telling your doctor if you see them can stop serious infections or more surgery.
When to Contact Your Surgeon Immediately
Knowing when to call your surgeon is key. If you notice any of these, call your surgeon right away:
- Severe pain that doesn’t go away with medicine
- Signs of infection, like fever or chills
- More redness, swelling, or discharge at the wound
- Sudden hip pain or feeling unstable
- Hard time moving your hip or leg
|
Complication |
Warning Signs |
Preventive Measures |
|---|---|---|
|
Hip Dislocation |
Sudden pain, instability, or change in leg length/position |
Avoid bending beyond 90 degrees, twisting, or crossing legs; use recliner or elevated toilet seat |
|
Wound Healing Issues |
Redness, swelling, increased pain, or discharge around the wound |
Keep wound clean and dry, follow post-operative care instructions |
By knowing these risks and taking steps to avoid them, patients can greatly reduce their chances of problems. This helps ensure a smoother recovery.
Adapting Your Home Environment for Hip Surgery Recovery
Preparing your home for hip surgery recovery is key for a safe and easy recovery. A well-prepared home can lower the risk of problems and make your recovery better.
Beyond the Bathroom: General Home Modifications
While making your bathroom safe is important, other parts of your home need attention too. Clearing clutter and reorganizing living spaces can help prevent falls. It makes moving around easier.
Also, think about the height of your furniture. Chairs and sofas should be high enough to sit and stand without hurting your hip. You might need to change or replace some furniture to help with your recovery.
Creating Safe Pathways Between Bedroom and Bathroom
The path between your bedroom and bathroom is very important during recovery. Making this path clear and safe can lower the chance of accidents. We recommend installing grab bars or handrails along walls for extra support.
If your bedroom and bathroom are on different floors, think about getting a temporary stairlift. Or make sure you have a safe way to go up and down stairs.
Good lighting is also key. Bright, motion-sensor lights are great for nighttime trips to the bathroom. They help prevent falls.
Temporary Furniture Arrangements for Recovery
The way you arrange your furniture can affect your recovery. We suggest setting up a recovery zone for resting, eating, and doing activities without moving too much. This might mean moving furniture or changing your living area to make it easier to get around.
Keep your essential items close. This way, you don’t have to get up and move around as much. Keep your phone, medications, water, and entertainment within reach.
Conclusion: Balancing Comfort and Safety During Hip Surgery Recovery
Recovering from hip surgery is all about finding the right balance. We’ve looked at how to use recliners and how to make your home safe. We’ve also talked about getting back to using the bathroom and making your home comfortable for recovery.
By following the recovery tips we’ve shared, patients can feel more confident. It’s important to find a balance between feeling comfortable and staying safe. This helps make the recovery process smoother and more effective.
As patients get better, it’s key to keep using safe sitting, standing, and moving techniques. This not only makes them feel better but also lowers the chance of problems. It helps them get the best results from their surgery.
A good recovery plan is essential. It should include the right seating, bathroom changes, and a safe home. By focusing on both comfort and safety, patients can get back to their daily lives and activities.
FAQ
When can I stop using a raised toilet seat after hip replacement surgery?
You should keep using a raised toilet seat for 6-8 weeks after surgery. Or until your doctor says it’s okay to stop. This time can change based on how you’re healing and your doctor’s advice.
How do I safely sit on a regular toilet after hip replacement?
To safely sit on a regular toilet, move slowly and keep your back straight. Avoid bending or twisting. Using a toilet safety frame or grab bars can also help.
What are the signs that I’m ready to transition to using a regular toilet after hip replacement?
You’re ready when you have enough strength and can sit and stand without pain. You should also be able to follow safety rules. Your doctor or physical therapist will tell you when it’s time to switch.
Can I use a regular toilet immediately after hip arthroscopy?
Some people can use a regular toilet right after hip arthroscopy. But, we often suggest a raised toilet seat or safety frame for a few days. Your doctor will guide you based on your recovery.
What bathroom modifications are essential after hip surgery?
Key bathroom changes include a raised toilet seat and grab bars or safety rails. A toilet safety frame or surround can also be helpful. These changes help prevent falls and make bathroom use safer.
How long does it take to regain bathroom independence after hip replacement surgery?
It usually takes 6-12 weeks to get back to using the bathroom on your own. How fast you recover depends on your health, following rehabilitation advice, and how quickly you heal.
Are there specific exercises that can help improve my bathroom independence after hip surgery?
Yes, exercises that strengthen your hip and improve balance are recommended. Your physical therapist will create a plan to help you regain strength and confidence in daily activities, including bathroom use.
Reference
National Center for Biotechnology Information. Evidence-Based Medical Insight. Retrieved from https://pubmed.ncbi.nlm.nih.gov/32746429/


