Advanced shoulder pain can really limit your life. But, a shoulder replacement X-ray can tell a big story. At Liv Hospital, we focus on excellence and care for our patients.
Studies show X-rays are key in checking shoulder replacement success. We use these images to make sure implants are in the right place. This helps us catch any problems early and get the best results for our patients.
Key Takeaways
- X-rays are vital for planning and checking shoulder replacement success.
- They help us see if implants are in the right spot after surgery.
- X-rays can spot problems early, helping us act fast.
- Good X-ray checks lead to better results in anatomic surgery.
- Liv Hospital is all about top-notch care and support.
The Importance of Shoulder Replacement Xray in Surgical Planning
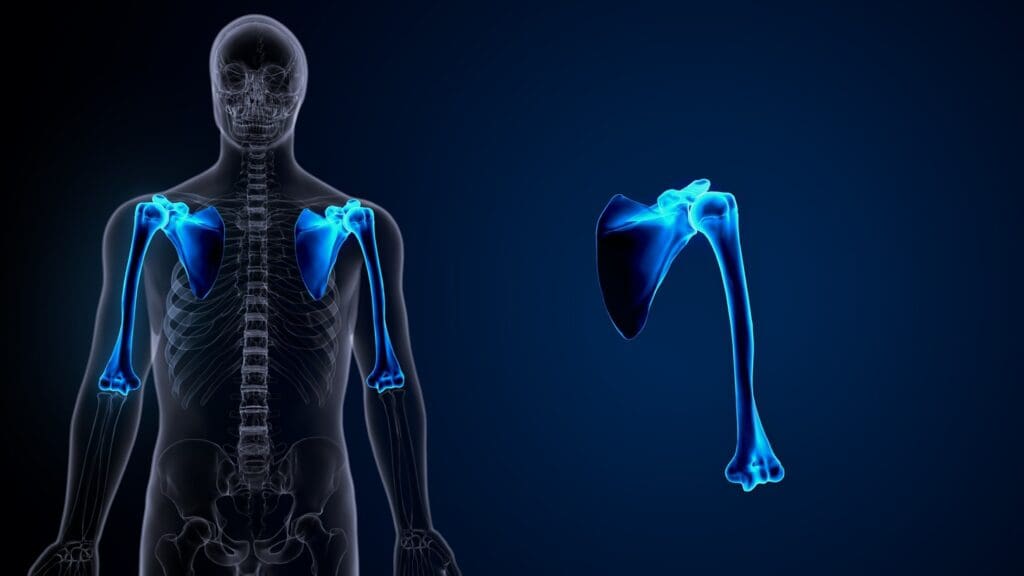
“X-rays are key tools for orthopedic surgeons planning shoulder surgery. They show the shoulder’s condition, which is vital for planning.” Shoulder replacement X-rays give important details about the shoulder joint. This is key for planning surgery.
Role in Pre-operative Assessment
Shoulder replacement X-rays check the shoulder joint before surgery. They help us see how much the joint has narrowed and the bone quality. These are important for choosing the right surgery.
“The quality of the bone and the extent of joint damage are critical factors that influence the choice between anatomic and reverse shoulder replacement.”
Guiding Surgical Decision-Making
X-rays guide our decisions on surgery. For example, they help decide if a patient is right for anatomic total shoulder replacement or if another method is better.
Research shows X-rays are key for planning anatomic total shoulder arthroplasty. They help place components more accurately, leading to better results.
Using X-rays in planning makes surgery more precise and improves patient results. This shows how important detailed checks before surgery are for a successful shoulder replacement.
Understanding Anatomic Shoulder Replacement

Anatomic shoulder replacement is a surgery that aims to fix the shoulder joint like it’s new. It’s designed to work like a healthy shoulder.
We’ll look at what makes anatomic shoulder replacement special. We’ll talk about how it differs from other surgeries, who’s a good candidate, and why the rotator cuff matters.
Anatomic vs. Reverse Shoulder Arthroplasty
Anatomic shoulder replacement and reverse shoulder arthroplasty are two different surgeries. They differ in how they fix the shoulder joint.
- Anatomic Shoulder Replacement: This surgery uses prosthetics that look like the real shoulder.
- Reverse Shoulder Arthroplasty: This surgery flips the shoulder joint around. It’s for severe rotator cuff damage or certain fractures.
Choosing between these surgeries depends on the patient’s shoulder, rotator cuff, and why they need surgery.
Ideal Candidates for Anatomic Total Shoulder Replacement
People with severe shoulder arthritis or damage might get this surgery. They should have a good rotator cuff and enough bone for the prosthetics.
These patients might see their shoulder work better and feel less pain after the surgery.
The Significance of Rotator Cuff Integrity
The rotator cuff is key for anatomic shoulder replacement to work. Studies show it’s essential for the prosthetic joint to function right.
Rotator cuff integrity is important because it helps the shoulder move and stay stable. Damage can make the surgery not work well, leading to more problems or needing another surgery.
We stress the need to check the rotator cuff before surgery. This helps choose the best surgery for each patient.
Components Visible in Shoulder Replacement Xray Images
Shoulder replacement X-rays show several important parts. These parts are key for the surgery’s success and the implant’s life span. Knowing about these parts helps both doctors and patients understand the surgery’s results.
Humeral Head Components
The humeral head component is a vital part of the shoulder replacement. It mimics the natural shape and function of the humeral head. On an X-ray, it looks like a metal structure that moves with the glenoid component. It’s important for the humeral head to fit right to ensure smooth movement and less wear.
Glenoid (Socket) Components
The glenoid component, or socket, is another key part seen in X-rays. It’s made of strong plastic or metal and helps the humeral head move smoothly. Getting the glenoid in the right spot is key to avoid problems like loosening or dislocation. A study in multimodality imaging in shoulder arthroplasties found that correct placement of the glenoid is vital for the implant’s long life.
Identifying Proper Component Positioning
Getting the components in the right place is essential for shoulder replacement success. X-rays show if the humeral head and glenoid are aligned correctly. Wrong placement can cause problems like reduced movement and wear. Doctors use X-rays to check if everything is in the right spot. Studies confirm that correct positioning is key for good results and a long-lasting implant.
X-ray Image #1: Pre-operative Assessment of Osteoarthritis
Before surgery, doctors check if a patient is right for anatomic total shoulder arthroplasty. This check is key to see how damaged the joint is and plan the surgery.
Identifying Joint Space Narrowing
Joint space narrowing is a big sign of osteoarthritis. It happens when cartilage wears down, making bones closer together. X-rays show how bad this narrowing is, which helps plan the surgery.
The degree of narrowing tells doctors how severe the osteoarthritis is. This helps decide if anatomic total shoulder arthroplasty is the right choice.
Evaluating Bone Quality and Deformity
X-rays also let doctors check bone quality and deformity. It’s important to see how dense the bone is and if there are any deformities. This helps place the prosthetic correctly for better results.
- Evaluating the presence of bone spurs or osteophytes
- Assessing the density of the bone
- Identifying any significant bone deformities
Planning for Anatomic Total Shoulder Arthroplasty
Doctors use X-ray info to plan anatomic total shoulder arthroplasty carefully. They pick the right prosthetic and choose the best surgery method.
By looking at X-rays, doctors can see what might go wrong during surgery. They can then plan how to fix these issues, making the surgery better.
X-ray Image #2: Immediate Post-operative Verification
We use immediate post-operative X-rays to check if implants are in the right place. These X-rays are key for the first look at how the surgery went. They help us see if the shoulder replacement parts are correctly placed.
Confirming Proper Implant Placement
The main goal of an immediate post-operative X-ray is to make sure the implants are in the right spot. We look at the humeral head and glenoid components to see if they’re aligned right. For more info on shoulder prostheses, check out this resource.
Assessing Initial Alignment
Getting the implants aligned right is key for the surgery’s success. The X-ray after surgery lets us check if everything is in the right spot. This is important for spotting any problems early.
Identifying Early Complications
Immediate post-operative X-rays also help find issues like periprosthetic fractures or component loosening early on. Finding these problems early means we can fix them quickly. This helps avoid bigger problems later.
Studies show how important these X-rays are. They help us make sure the implants are aligned right and catch any early problems. This way, we can make any needed changes quickly, improving the surgery’s results.
X-ray Image #3: Two-Week Follow-up Assessment
After shoulder replacement surgery, a two-week X-ray check is done. It looks at how the body is healing and if the implant is in the right place. This check is key to seeing how well the patient is recovering.
Evaluating Healing Progress
The main goal of the two-week X-ray is to see how the patient is healing. We look at the X-rays for any early problems or issues with the implant.
Key factors assessed during this evaluation include:
- Positioning of the implant
- Alignment of the shoulder joint
- Early signs of bone healing
Visualizing the Shoulder Replacement Incision
X-rays can’t show soft tissues like the incision site. But, we can guess how the incision is healing by looking at the implant and bone around it.
Early Signs of Successful Integration
For the surgery to work well in the long run, the implant needs to integrate well. We look for signs like the implant being in the right place, bone healing, and no early problems.
| Indicator | Description | Significance |
|---|---|---|
| Implant Alignment | Proper positioning of the implant within the shoulder joint | Ensures proper functioning of the shoulder |
| Bone Healing | Initial signs of bone integration around the implant | Indicates successful integration and stability |
| Absence of Complications | No signs of infection, fracture, or implant failure | Reduces risk of revision surgery |
By watching these signs closely during the two-week check, we can spot problems early. This helps us take action to make sure the patient gets the best results.
X-ray Image #4: Three-Month Evaluation of Implant Stability
Looking at shoulder replacement X-rays at three months gives us important info. We see how stable the implant is and how well the patient is recovering. We check if the implant has bonded well with the bone and how much movement the patient has.
Signs of Proper Bone Integration
Good bone integration is key for a successful shoulder surgery. On X-rays, we look for no gaps around the implant and bone growth. Research shows that good bone integration means the implant will likely stay stable for a long time.
Range of Motion Assessment
X-rays mainly show bone details, but they also hint at how much movement is possible. The right placement of the implant is vital for good movement. Our patients work on a rehab program to improve their movement.
Common Findings in Right Total Shoulder Replacement
For right total shoulder replacements, X-rays at three months show changes in bone density and early signs of bone remodeling. It’s important to compare these with pre-surgery X-rays to see how recovery is going. We also check for any issues like the implant coming loose or being in the wrong place.
By studying these X-rays, we understand how stable the implant is and how the patient is doing. This helps us decide on the best treatment and rehab plan.
X-ray Image #5: Detecting Possible Complications
Complications like implant loosening or fractures can be spotted in X-ray images. X-rays are key in checking on the shoulder replacement after surgery. They help doctors find any problems early.
Identifying Implant Loosening
Implant loosening is a big problem that can make the shoulder replacement fail. On an X-ray, a radiolucent line around the implant shows it’s not sticking to the bone. We watch for this to act fast.
Recognizing Periprosthetic Fractures
Periprosthetic fractures, or breaks near the implant, can also be seen on X-ray. These breaks might happen because of a fall or too much stress on the bone and implant. Finding them early is key to fixing them right.
Diagnosing Component Wear or Failure
X-rays can also show if parts of the implant are wearing out or failing. Signs include asymmetric wear patterns on the glenoid or humeral parts. Spotting these problems helps us plan for surgery to make the replacement last longer.
Getting regular X-rays is important to keep an eye on the shoulder replacement. This way, we can catch and fix any issues quickly. It helps make sure patients are happy and do well.
X-ray Image #6: One-Year Follow-up for Right Shoulder Arthroplasty
At the one-year mark, X-rays give us key insights into right shoulder arthroplasty success. This follow-up is vital for checking the implant’s long-term stability and function. We’ll look at what the X-ray should show and how to judge the implant’s performance over time.
Expected Radiographic Appearance
One year post-surgery, the X-ray should reveal a well-integrated implant with no loosening or wear. The bone should have healed around the implant. The component’s position should match the surgery’s technique.
Assessing Long-term Stability
Long-term stability is checked by comparing the one-year X-ray with earlier images, like the immediate post-op X-ray. We look for any changes in the component’s position, bone resorption, or signs of complications.
Comparing to Baseline Images
It’s important to compare the one-year X-ray to baseline images. This comparison helps spot subtle changes not seen in a single image. It lets us see how well the implant has integrated and the success of the arthroplasty.
| Radiographic Feature | Expected Appearance at 1 Year |
|---|---|
| Implant Positioning | Consistent with proper surgical technique |
| Bone Integration | Evidence of bone healing around the implant |
| Component Wear | No significant wear or loosening |
X-ray Image #7: Long-term Monitoring of Anatomic Shoulder Arthroplasty
The seventh X-ray image shows why long-term monitoring is key in anatomic shoulder arthroplasty. It’s important to track how well the implant lasts over time.
Five-Year Radiographic Milestones
By the fifth year after the implant, we look for certain signs. These include:
- Stable implant positioning
- Absence of significant loosening
- Proper bone integration around the implant
- No signs of periprosthetic fractures
These signs mean the shoulder arthroplasty is working well.
Signs of Normal Aging vs. Concerning Changes
It’s important to tell the difference between normal aging and changes that might be a problem. Normal aging might show:
- Minor bone density changes
- Slight wear on the implant
But, changes that could be a problem include:
- Significant implant loosening
- Periprosthetic fractures
- Advanced wear or failure of the implant components
Catching these problems early can help avoid bigger issues later.
Predicting Longevity of Shoulder Replacement Parts
To guess how long shoulder replacement parts will last, we look at several things. These include:
- Patient’s age and activity level
- Implant design and material
- Surgical technique
- Post-operative care and rehabilitation
By watching these factors and X-ray images, we can guess how long the implant will last. This helps us plan for the future.
How to Interpret Your Own Shoulder Replacement Xray
Understanding your shoulder replacement X-ray is key to tracking your recovery and spotting issues early. As a patient, knowing about your X-ray results helps you talk better with your healthcare team. It also lets you make informed choices about your care.
Key Features Patients Should Understand
When looking at your shoulder replacement X-ray, there are important things to check. These include the implant’s position, the bone’s condition, and any signs of complications.
- The humeral component should be properly aligned with the shaft of the humerus.
- The glenoid component should be securely fixed to the glenoid surface.
- Look for any signs of loosening or migration of the components.
- Check for any fractures or bone loss around the implant.
Knowing these details helps you spot any issues and talk about them with your surgeon.
Questions to Ask Your Surgeon
When you talk about your X-ray with your surgeon, ask the right questions. Here are some examples:
- Is the implant properly positioned and aligned?
- Are there any signs of loosening or wear on the components?
- How is the surrounding bone quality?
- Are there any complications we should watch for?
These questions help you understand your X-ray results and your shoulder’s health better.
Red Flags That Warrant Immediate Attention
While looking at your X-ray, watch out for red flags that mean you need to see a doctor right away. These include:
| Red Flag | Description |
|---|---|
| Implant Loosening | A clear zone around the implant indicating loosening. |
| Periprosthetic Fracture | A fracture around the implant. |
| Component Wear or Failure | Visible wear or damage to the implant components. |
By learning to interpret your shoulder replacement X-ray, you can be more involved in your recovery and care. Always talk to your healthcare provider for a professional look at your X-ray results.
Conclusion: The Vital Role of Ongoing Radiographic Evaluation
Ongoing radiographic evaluation is key to the success of shoulder replacement. Regular X-rays are vital for the long-term health of the replacement. Studies prove that these X-rays help monitor the implant and bone.
Healthcare professionals can spot issues early with Xray images. This includes problems like implant loosening or bone fractures. Early detection leads to better treatment outcomes. It also checks how well the implant fits with the bone, which is essential for success.
We advise patients to keep their follow-up appointments for X-rays. This ensures their shoulder replacement works well. Ongoing evaluation helps us give the best care to those with anatomic shoulder replacements.
What is the significance of shoulder replacement X-rays in understanding anatomic surgery?
Shoulder replacement X-rays are key in understanding anatomic surgery. They show the shoulder joint before and after surgery. This helps confirm if the implants are in the right place and if there are any issues.
How do X-rays help in pre-operative assessment for anatomic total shoulder replacement?
X-rays help by checking the joint space, bone quality, and any deformities. This info helps decide if anatomic or reverse shoulder replacement is best.
What is the difference between anatomic and reverse shoulder arthroplasty?
Anatomic shoulder arthroplasty replaces the damaged joint with prosthetics that match the natural shoulder. Reverse shoulder arthroplasty changes the joint’s anatomy to help patients with certain shoulder damage or arthritis.
What are the ideal candidates for anatomic total shoulder replacement?
The best candidates have osteoarthritis or other degenerative conditions that haven’t improved with treatment. They should have a healthy rotator cuff and good bone quality for the implant.
How do X-rays help in evaluating the components of shoulder replacement?
X-rays check the humeral head and glenoid components’ position and alignment. This is important for the implant’s success and longevity.
What should be assessed in immediate post-operative X-rays?
Post-operative X-rays should check if the implants are in the right place and if there are any early issues like fractures.
What is the significance of two-week follow-up X-rays?
Two-week X-rays show how the shoulder is healing and if the replacement is integrating well. They also check for any early signs of success.
How do three-month follow-up X-rays help in assessing implant stability?
Three-month X-rays check if the implant is stable by looking at bone integration and range of motion. They also look for common issues in right shoulder replacements.
What is the expected radiographic appearance at one-year follow-up for right shoulder arthroplasty?
At one year, X-rays should show a stable implant with good bone integration. They should also not show significant complications. Comparing these X-rays to the initial ones helps assess long-term stability.
How is long-term monitoring of anatomic shoulder arthroplasty done?
Long-term monitoring uses regular X-rays to check the implant’s longevity and any changes. This helps predict future complications.
How can patients interpret their own shoulder replacement X-rays?
Patients should look for implant positioning, bone integration, and any signs of complications. They should discuss any concerns with their surgeon and know when to seek immediate help.
What are the key features to look for in shoulder replacement X-rays?
Important features include proper implant positioning, bone integration, joint alignment, and signs of complications like loosening or fractures.
References
- Multimodality Imaging in Shoulder Arthroplasties, Part 1: Biomechanics, Indications, Preoperative Imaging, and Types of Arthroplasties – A Pictorial Review. (n.d.). Retrieved from https://mss-ijmsr.com/multimodality-imaging-in-shoulder-arthroplasties-part-1-biomechanics-indications-preoperative-imaging-and-types-of-arthroplasties-a-pictorial-review/
- Total Shoulder Arthroplasty. (n.d.). Radiopaedia. Retrieved from https://radiopaedia.org/articles/total-shoulder-arthroplasty-1


