
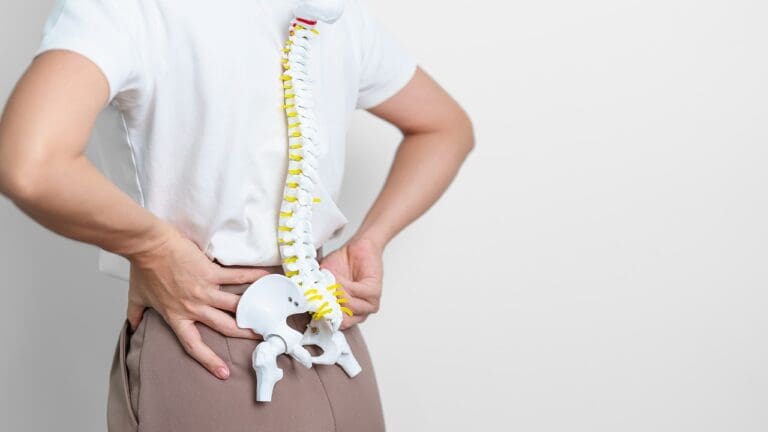
Elevating your knee is a simple yet effective way to help with healing after injuries or surgeries. Keeping your knee above heart level can reduce swelling and improve blood flow. This helps speed up your recovery. At Liv Hospital, we know how important proper knee elevation is for the best recovery.
Proper elevation techniques can greatly improve your recovery. Our guide will show you the best ways to elevate your knee. This ensures you can manage your discomfort well. We focus on your comfort and health, giving you reliable clinical advice.
Key Takeaways
- Elevating the knee above heart level reduces swelling.
- Proper elevation promotes blood flow, aiding in the healing process.
- Effective knee elevation can speed up recovery after injuries or surgeries.
- Following the right techniques is key for the best results.
- Liv Hospital offers trusted clinical guidance for knee elevation.
Understanding Knee Elevation and Its Importance

Proper knee elevation is key for healing from knee injuries or surgeries. It’s a simple yet powerful method. We’ll look at why it’s so important and when it’s most helpful.
Why Elevation Is Crucial for Knee Recovery
Elevating your knee helps reduce swelling and aids in recovery. It lets gravity pull fluid away from the injured spot. This reduces inflammation and pain.
Using knee elevation with icing and compression boosts its benefits. Here are some advantages:
- Reduced Swelling: Elevating your knee helps clear out fluid from the injured area.
- Pain Relief: It can lessen pain by reducing swelling and improving blood flow.
- Faster Recovery: Knee elevation speeds up healing by reducing inflammation and promoting drainage.
When You Should Elevate Your Knee
It’s important to know when to elevate your knee for the best results. You should do it in these situations:
- Post-Surgery: After knee surgery, elevation helps manage swelling and pain.
- Acute Injuries: For acute knee injuries like sprains or strains, elevation reduces inflammation.
- Chronic Conditions: Regular elevation helps manage symptoms and improves comfort for those with chronic knee issues.
Understanding knee elevation’s importance and using it correctly can greatly improve your recovery.
The Science Behind Knee Elevation

Knee elevation is backed by medical research. It uses gravity and physiology to help with recovery.
How Elevation Reduces Swelling and Pain
Elevating the knee cuts down blood flow to the area. This reduces swelling. With less swelling, pain also decreases because there’s less pressure on nerves and tissues.
The physiological basis for this relief is the decrease in fluid buildup. This is due to gravity’s effect on blood flow and lymphatic drainage.
The Role of Gravity in Preventing Fluid Buildup
Gravity is key in preventing fluid buildup when elevating the knee. By placing the knee above heart level, gravity helps reduce fluid in the knee. This minimizes swelling.
| Effect of Elevation | Physiological Response |
|---|---|
| Reduces blood flow to the knee | Decreases swelling |
| Enhances lymphatic drainage | Reduces pain and inflammation |
Understanding the science behind knee elevation helps us use it better in recovery.
How to Properly Elevate Your Knee: The Correct Technique
Elevating your knee right is more than just lifting it up. It’s about the right position and support. We aim to heal and ease pain by setting up the best environment.
It’s key to keep your knee straight and well-supported. Use pillows or special knee elevation tools. Place a pillow under your knee for a gentle slope. This keeps your knee above your heart to cut down swelling.
Avoid bending or twisting your knee when elevating. Wrong positioning can cause more pain and slow healing. Also, don’t elevate your knee too high to avoid straining your back and muscles.
The right way to elevate your knee mixes the right body position and support tools. Here’s what to keep in mind:
| Aspect | Correct Technique | Common Mistakes |
|---|---|---|
| Knee Positioning | Keep the knee straight and supported | Bending or twisting the knee |
| Elevation Height | Elevate above the level of the heart | Elevating too high or not high enough |
| Support Devices | Use pillows or specialized elevation devices | Using inadequate or improper support |
Stick to these tips and avoid common mistakes to elevate your knee effectively. This way, you’ll get the most out of this recovery method. The goal is to make a comfy and supportive space for healing and less pain.
Essential Equipment for Effective Knee Elevation
Having the right equipment is key for knee elevation. It helps reduce swelling and pain. The right tools and devices support and comfort you, making recovery easier.
Using Pillows for Proper Support
Pillows are a simple and common way to elevate your knee. Pillows provide the necessary support when you’re lying down or sitting. Stack pillows under your leg for a comfortable height.
Make sure your knee is elevated and supported without straining your back or leg. Choosing the right pillows is important. Look for firm pillows that support your leg without being too hard. Memory foam pillows are great because they mold to your leg, giving consistent support.
Specialized Elevation Devices and Their Benefits
For more support, there are specialized elevation devices. These are made just for knee elevation and offer better support than pillows. You can find wedges, leg rests, and adjustable devices.
These devices can be adjusted to the perfect height for your knee. They provide optimal support and comfort. Some even have cooling or heating packs to help with recovery.
DIY Solutions for Knee Elevation at Home
You don’t need to buy specialized devices to elevate your knee at home. DIY solutions can work well. Use a firm cushion, a rolled-up blanket, or even books to make a leg rest.
For a DIY solution to work, it must be stable and comfortable. Get creative with what you have at home to make a supportive knee elevation system.
Step-by-Step Guide to Elevating Your Knee
To get the most out of knee elevation, it’s essential to follow a step-by-step approach. We will guide you through the process, ensuring that you can elevate your knee effectively and safely.
Step 1: Preparing Your Elevation Area
Before you start elevating your knee, it’s important to prepare a comfortable and safe area. Choose a quiet, comfortable space where you can relax without distractions. Make sure the area is clear of any obstacles or tripping hazards.
Tips for preparing your elevation area:
- Use a comfortable chair or recliner with adequate back support.
- Keep pillows and blankets nearby for additional support and comfort.
- Have a cold pack or ice pack ready if you’re using ice as part of your recovery protocol.
Step 2: Positioning Your Body Correctly
Proper body positioning is vital for effective knee elevation. We suggest lying down or sitting in a reclined position, ensuring that your knee is above the level of your heart to reduce swelling.
Key considerations for body positioning:
- Keep your knee straight and supported.
- Avoid bending or twisting your knee.
- Use pillows or cushions to support your leg and maintain the desired elevation.
Step 3: Placing Supports Under Your Knee
Placing the right supports under your knee is essential for maintaining proper elevation. We advise using pillows or specialized elevation devices to support your knee and keep it elevated.
Best practices for placing supports:
- Use firm pillows that can maintain their shape under the weight of your leg.
- Place the pillows under your knee and calf to keep your leg straight and elevated.
- Adjust the pillows as needed to achieve a comfortable position.
Step 4: Maintaining Proper Alignment
Maintaining proper alignment of your knee is vital for effective elevation and to prevent further injury. We recommend checking your knee position regularly to ensure it remains aligned correctly.
Tips for maintaining alignment:
- Keep your knee straight and avoid bending it.
- Ensure that your leg is not rotated or twisted.
- Use additional pillows or supports if necessary to maintain proper alignment.
The RICE Method for Knee Injuries
The RICE method is key for treating knee injuries. It stands for Rest, Ice, Compression, and Elevation. This approach is great for many knee injuries, like sprains, strains, and ligament tears.
Rest: The First Step in Recovery
Resting your knee is vital in the early stages of healing. Stay away from activities that make the injury worse. Resting helps avoid further injury and starts the healing process.
For at least 48 to 72 hours after injury, avoid hard activities. Make your daily life easier on your knee.
Ice: Best Practices for Icing Your Knee
Ice is good for reducing knee pain and swelling. Apply ice for 15-20 minutes, 3-4 times a day. Always wrap the ice in a towel to avoid skin burns.
Use ice packs or a frozen bag of peas in a cloth. The cold tightens blood vessels, cutting down on swelling.
Compression: Supporting Your Knee
Compression reduces swelling by tightening the affected area. A compression bandage or sleeve works well. Make sure it’s not too tight to avoid cutting off circulation.
| Compression Level | Description |
|---|---|
| Mild | Slightly snug, comfortable |
| Moderate | Firm, but not constricting |
| Too Tight | Painful, numbness, or tingling |
Elevation: Completing the Recovery Process
Elevating your knee above your heart reduces swelling. Do this with the other RICE steps for best results.
“Elevation is a simple yet effective way to aid in the recovery process. By propping up the injured knee, individuals can significantly reduce swelling and promote healing.”
Use pillows or a wedge to support your knee while elevating. Aim for a comfortable position that also elevates well.
Best Way to Ice a Knee While Elevated
Icing your knee while it’s elevated can help reduce pain and swelling. It’s important to do it right. Using ice and elevation together is part of the RICE method for knee injuries and pain.
Proper Icing Techniques and Duration
To ice your knee right while elevated, follow these steps:
- Apply ice for 15-20 minutes at a time.
- Make sure there’s a barrier between the ice pack and your skin to avoid frostbite.
- Repeat icing every 2-3 hours in the first 48-72 hours after injury or surgery.
Types of Ice Packs and Their Effectiveness
There are many ice packs out there, each with its own benefits:
| Type of Ice Pack | Effectiveness | Convenience |
|---|---|---|
| Gel Ice Packs | High | Reusable, flexible |
| Crushed Ice Packs | High | Disposable, fits body shape |
| Cold Compresses | Moderate | Reusable, can be hot or cold |
Safety Precautions When Icing
While icing is good, it’s key to follow safety tips to avoid problems:
- Never put ice directly on your skin.
- Watch for frostbite signs like numbness or color changes.
- If icing hurts or feels wrong, stop and see a doctor.
Elevation Strategies for Different Knee Conditions
Different knee conditions need special elevation plans for the best healing. Knee elevation is flexible and works for many knee issues. It helps from after surgery to chronic knee pain.
Post-Surgery Elevation Protocol
After knee surgery, elevating the knee is key to reduce swelling and aid recovery. Elevate the knee above your heart to cut down fluid and pain. Pillows or special devices help keep it right.
Key considerations for post-surgery elevation include:
- Elevating the knee for at least 30 minutes, several times a day
- Using ice packs with elevation to lessen pain and swelling
- Watch for signs of trouble, like more pain or swelling
Elevation for Meniscus Tears and Ligament Injuries
Elevation is vital for meniscus tears and ligament injuries to lessen swelling and aid healing. Elevate your knee during rest, mainly in the early recovery stages.
| Condition | Elevation Frequency | Additional Recommendations |
|---|---|---|
| Meniscus Tears | 3-4 times a day | Use compression bandages and ice packs |
| Ligament Injuries | 4-5 times a day | Immobilize the knee with a brace if necessary |
Elevation for Sprains, Strains, and General Swelling
Elevation is key in the early stages for sprains, strains, and swelling. Elevate the knee above heart level to help fluid drain.
Combining elevation with icing and compression is best for recovery.
Chronic Knee Pain Management
Elevation is helpful for chronic knee pain. Regular elevation can lessen swelling and pain.
Knowing the right elevation for your knee condition can improve recovery and symptom management. Whether it’s post-surgery, a meniscus tear, or chronic pain, the right approach makes a big difference.
Creating an Effective Knee Elevation Schedule
Having a good knee elevation schedule can really help with recovery. It’s important to be consistent to reduce swelling and pain. We’ll show you how to make a schedule that fits your day and night.
Daytime Elevation Practices
It’s key to elevate your knee often during the day. Elevate it for 15-20 minutes, 3-4 times a day. You can use pillows or special devices to support your knee while sitting or lying down.
Tips for Daytime Elevation:
- Use a timer to remind you when it’s time to elevate your knee.
- Elevate your knee above the level of your heart to reduce swelling.
- Take breaks to move around and stretch your leg.
Nighttime Elevation for Continuous Relief
Elevating your knee at night is just as important as during the day. Elevate your knee while sleeping to keep the relief going. You can use a wedge pillow or regular pillows to support your knee.
Nighttime Elevation Tips:
- Experiment with different pillow arrangements to find a comfortable position.
- Consider using a specialized knee elevation device designed for nighttime use.
- Keep your knee elevated above the level of your heart to maximize the benefits.
When to Reduce Elevation Frequency
As your knee heals, you might need to change your elevation schedule. Watch your symptoms closely and start reducing elevation frequency as your knee gets better.
| Recovery Stage | Elevation Frequency | Symptoms to Monitor |
|---|---|---|
| Acute Phase (0-3 days) | Every 2-3 hours | Swelling, pain, redness |
| Sub-Acute Phase (4-7 days) | 3-4 times a day | Reduced swelling, improving pain |
| Recovery Phase (after 7 days) | As needed | Minimal swelling, significant pain reduction |
By following this guide and adjusting your knee elevation schedule, you can improve your recovery. This will help you get the best results.
Conclusion
Proper knee elevation is key for recovering from knee injuries and surgeries. We’ve shown how elevation helps reduce swelling and pain. We also gave a step-by-step guide on how to do it right.
By following our guidelines on technique, equipment, and timing, you can use knee elevation effectively. This helps in your recovery. Remember, consistent practice is essential for the best results.
The role of proper elevation in preventing fluid buildup and promoting healing is huge. We urge everyone to add knee elevation to their recovery plan. Use the tips we provided to help you succeed.
What is the best way to elevate my knee for recovery?
To elevate your knee right, put it above your heart. Use pillows or special devices. Make sure it’s straight and fully supported.
How often should I elevate my knee during the day?
Elevate your knee 15-20 minutes, a few times a day. Do this after activities that hurt your knee or after surgery.
Can I elevate my knee while sleeping?
Yes, you can. Use a wedge pillow or pillows under your knee. This keeps your knee up while you sleep.
What is the RICE method for treating knee injuries?
RICE means Rest, Ice, Compression, and Elevation. It helps with swelling, pain, and healing knee injuries.
How do I properly ice my knee while it’s elevated?
Ice your knee with an ice pack in a cloth. Do this for 15-20 minutes, a few times a day. Keep your knee up.
What are the benefits of elevating my knee after surgery?
Elevating your knee after surgery reduces swelling. It also helps with blood flow and healing. This speeds up recovery.
Can elevation help with chronic knee pain management?
Yes, elevation can help with chronic knee pain. It reduces swelling and eases pressure on nerves and tissues.
How long should I continue to elevate my knee?
How long you elevate your knee depends on your condition. Keep elevating until swelling goes down and pain lessens. Your doctor will tell you when to stop.
Are there any specialized devices for knee elevation?
Yes, there are devices like knee elevation pillows and wedge pillows. They offer support and comfort during recovery.
Can I use DIY solutions for knee elevation?
Yes, you can use DIY solutions like stacked pillows or a foam wedge. Just make sure your knee is straight and supported.
Reference
- BoneFoam. (n.d.). Post knee replacement surgery: Leg elevation. https://www.bonefoam.com/blog/post-knee-replacement-surgery-leg-elevation popb.md
- University of Utah Health. (n.d.). Joint replacement patient guide: Recovery. https://healthcare.utah.edu/orthopaedics/specialties/joint-replacement/patient-guide/recovery


