
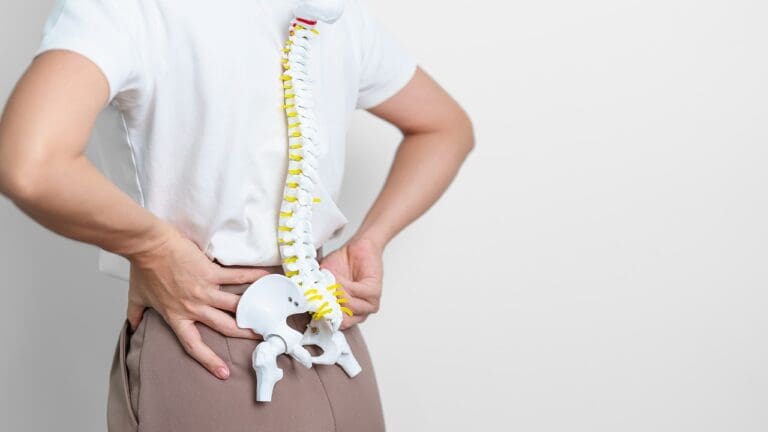
A thrown out lower back, known as acute lumbar strain, is a sudden injury. It affects the muscles, tendons, or ligaments around the spine. This can cause sharp pain that makes it hard to move. Gentle stretches to do when you throw your back out to reduce muscle spasms and alleviate severe pain.
At Liv Hospital, we know how this injury can disrupt your life. We offer patient-centered care. This combines the best international practices with caring treatment.
Acute low back pain can feel different for everyone. It might be sharp or just a dull ache. Knowing how to treat it can help you heal faster and get back to your daily activities.
Key Takeaways
- Understanding the causes and symptoms of a thrown out lower back
- Learning quick relief stretches to alleviate pain
- Evidence-based treatment strategies for faster recovery
- The importance of patient-centered care in treatment
- Combining international best practices with compassionate care
Understanding a Thrown Out Lower Back

A thrown out lower back often comes from acute lumbar strain. This condition can really affect your daily life. It happens when the muscles or ligaments in your lower back get stretched or torn, causing pain and discomfort.
What Is Acute Lumbar Strain?
Acute lumbar strain is sudden lower back pain from injury or strain. It affects the muscles and ligaments that support the spine. This condition leads to inflammation and pain in the affected area.
It’s a common problem, affecting many people. Studies show over 80 percent of people will get low back pain at some point. It can be caused by sudden movements, heavy lifting, or bad posture.
Common Causes and Risk Factors
Several things can lead to acute lumbar strain. These include:
- Lifting heavy objects the wrong way
- Making sudden or awkward movements
- Having poor posture or biomechanics
- Having past back injuries or conditions
- Muscle imbalances or weaknesses
Medical Expert, “This is more common with combined movements, such as when you combine bending with twisting.” Knowing these risk factors can help prevent future episodes.
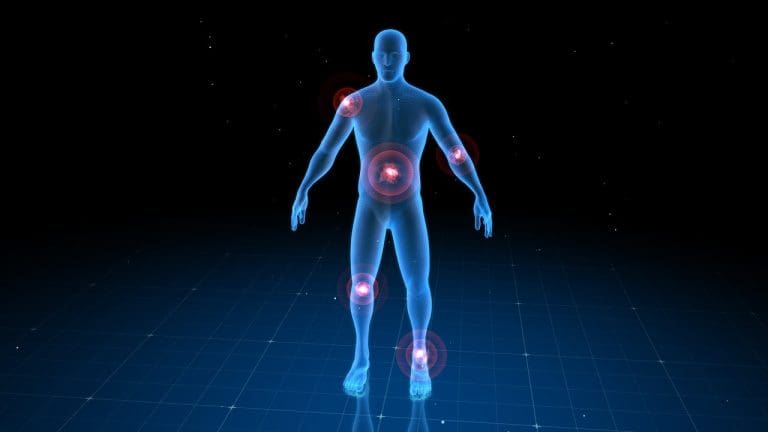
Typical Symptoms and Pain Patterns
The symptoms of acute lumbar strain vary but usually include:
- Sharp or dull pain in the lower back
- Stiffness or reduced mobility
- Muscle spasms
- Pain radiating to the buttocks or thighs
The pain pattern can help diagnose the condition. For example, pain that gets worse with movement or certain positions shows how severe the strain is.
Symptom | Description | Severity |
Sharp Pain | Sudden onset of severe pain | High |
Dull Ache | Continuous, less severe pain | Low-Moderate |
Stiffness | Reduced flexibility and mobility | Variable |
By understanding the causes, risk factors, and symptoms of a thrown out lower back, individuals can start their recovery and prevention journey.
Immediate Actions for Acute Back Pain Relief

When acute back pain hits, knowing what to do first can help a lot. It can really mess up your day and how you feel. We’ll look at ways to make it better.
The R.I.C.E. Method for Back Pain
The R.I.C.E. method is a well-known way to handle back pain. It stands for Rest, Ice, Compression, and Elevation. Rest is key to let the area heal. Try to avoid things that make the pain worse.
- Rest: Stay away from hard activities.
- Ice: Use ice packs to cut down swelling.
- Compression: Use gentle pressure to lessen swelling.
- Elevation: Keep the area above your heart when you can.
Optimal Resting Positions to Reduce Strain
Choosing the right way to rest can help your back a lot. Try these:
- Lying on your back with a pillow under your knees.
- Lying on your side with a pillow between your knees.
These positions ease the pressure on your spine and muscles. They help you get better.
Proper Application of Ice and Heat Therapy
Ice and heat are both good for back pain, but they’re used at different times. Ice therapy is for the first few days to lower swelling. Heat therapy is for later to relax muscles and improve blood flow.
To use ice or heat right:
- Use ice packs for the first 48-72 hours after pain starts.
- Switch to heat after swelling goes down, or for ongoing pain.
Medical Expert. Rest is important, but moving a bit can also help. Finding the right balance is key.
Most people get better in about 2 weeks. By using the R.I.C.E. method, good resting positions, and ice and heat therapy, you can manage back pain well. This helps you get back to normal faster.
Essential Stretches to Do When You Throw Your Back Out
When you throw your back out, finding relief quickly is key. Gentle stretches can help a lot. Most people with back strain get better in about 2 weeks. Gentle stretching is important for recovery.
First 24-48 Hours: Gentle Movement Strategies
In the first 24-48 hours, it’s important to move gently. Gentle stretches keep your muscles flexible and reduce stiffness. Start with slow, controlled movements and gradually increase as you feel more comfortable.
Gentle Movement Tips:
- Move slowly and avoid jerky movements.
- Stop if you experience sharp pain.
- Begin with short sessions and gradually increase duration.
Proper Breathing Techniques During Stretching
Proper breathing is key during stretching. Slow, deep breathing can help reduce pain, as a 2022 study found. “Slow, deep breathing helps to reduce pain intensity,” says Medical Expert.
Slow, deep breathing helps to reduce pain intensity, according to a 2022 study published in the Journal of Evidence-Based Integrative Medicine.
How to Modify Stretches Based on Pain Level
It’s important to adjust stretches based on your pain level. If a stretch hurts, stop and change your position. Start with gentle stretches and slowly increase the intensity as you feel more comfortable.
Pain-Level Guidelines:
- Mild discomfort: Continue with caution.
- Moderate pain: Modify the stretch to reduce intensity.
- Sharp or severe pain: Stop the stretch immediately.
Knee-to-Chest Stretches for Immediate Relief
Knee-to-chest stretches are a simple yet effective way to ease lower back pain. They help relax the muscles, reduce tension, and boost flexibility.
Single Knee-to-Chest Technique
The single knee-to-chest technique is a gentle stretch for the lower back and gluteal muscles. Here’s how to do it:
- Lie on your back with your knees bent and feet flat on the floor.
- Gently bring one knee towards your chest, holding onto your knee with your hand.
- Hold the stretch for 20-30 seconds, breathing deeply and feeling the stretch in your lower back.
- Slowly return your knee to the starting position and repeat on the other side.
Double Knee-to-Chest Variation
The double knee-to-chest variation offers a deeper stretch. It involves bringing both knees towards your chest at once.
- Lie on your back with your knees bent and feet flat on the floor.
- Gently bring both knees towards your chest, holding onto them with your hands.
- Hold the stretch for 20-30 seconds, feeling the stretch in your lower back and hips.
- Slowly return your knees to the starting position.
Using Props for Support and Comfort
Using props can make knee-to-chest stretches more comfortable and effective. A towel or strap can support your knees if they’re hard to hold.
Tips for using props:
- Loop a towel or strap around the back of your knees to gently pull them towards your chest.
- Adjust the length of the towel or strap to a comfortable position.
- Use a pillow or cushion under your head and neck for additional support.
Adding knee-to-chest stretches to your routine can greatly reduce lower back pain and improve flexibility. Always listen to your body and adjust the stretch as needed.
Gentle Spinal Mobility Stretches
Gentle spinal mobility stretches are key for managing lower back pain. Barry Shafer, a physical therapist, says, “The most important thing is to keep moving.” These stretches help a lot.
Supine Spinal Twist with Bent Knees
The supine spinal twist is a great stretch for the spine. Lie on your back with knees bent and feet flat. Slowly move your knees to one side, keeping your shoulders down.
Hold for a few breaths and then go back to the start. Do the same on the other side.
Benefits: This stretch relaxes the lower back and makes the spine more flexible.
Seated Rotation Stretches
Seated rotation stretches are good for the spine. Sit on a chair with your feet on the floor. Twist your torso to one side, keeping your hips facing forward.
Tip: Move slowly and carefully to avoid making the injury worse.
Standing Supported Twists
Standing supported twists are great for moving the spine while standing. Stand with your feet shoulder-width apart and hold onto something stable. Twist your torso to one side and then the other, keeping your hips and legs steady.
To summarize the benefits and key points of these stretches, refer to the following table:
Stretch | Benefits | Tips |
Supine Spinal Twist | Relaxes lower back muscles, improves spinal flexibility | Keep knees bent, lower slowly |
Seated Rotation | Improves spinal mobility, reduces stiffness | Keep hips facing forward, twist slowly |
Standing Supported Twist | Improves standing posture, enhances spinal mobility | Hold onto a stable object, twist gently |
Floor-Based Stretches for Lower Back Relief
Gentle floor-based stretches are a great way to start healing a thrown out lower back. They help ease tension, boost flexibility, and relax the body. Adding these stretches to your daily routine is a good first step towards recovery.
Cat-Cow Movement Sequence
The cat-cow movement is a simple yet effective way to warm up your spine and ease lower back tension. Start on your hands and knees. Inhale and arch your back, lifting your tailbone and looking up (the “cat” position).
Exhale and round your back, tucking your chin to your chest. Let your head and tailbone drop towards the floor (the “cow” position). Do this several times to flex and relax your spine.
Child’s Pose Variations
Child’s pose is a restorative stretch for the lower back. Start on your hands and knees. Sit back onto your heels and stretch your arms out, lowering your forehead to the ground.
You can adjust child’s pose to fit your needs. Try different arm positions or use props for support. For example, a pillow or block under your forehead can add comfort.
Benefits of Child’s Pose:
- Relaxes the back muscles
- Stretches the hips and thighs
- Calms the mind and promotes relaxation
Sphinx and Cobra Progressions
Sphinx and cobra poses are gentle backbends that strengthen the back muscles and improve flexibility. For sphinx pose, lie on your stomach with your forearms on the ground. Lift your chest and head off the mat.
“Hamstrings and gluteals—your butt muscles—are two big muscle groups that connect to your pelvis and lower spine,” says Barry Shafer.
Cobra pose is a deeper backbend that strengthens the back muscles further. Lie on your stomach with your hands under your shoulders. Inhale and press your palms into the ground, lifting your chest and head off the mat.
By adding these floor-based stretches to your daily routine, you can manage lower back pain and improve spinal health.
Standing and Seated Stretches for Recovery Phase
As we move into the recovery phase, adding standing and seated stretches can really help. These stretches are gentle, easy to do, and fit into our daily lives. They offer relief and help us stay flexible.
Gentle Forward Folds with Support
Gentle forward folds stretch the back, hips, and legs well. Stand with your feet apart and face a sturdy chair or wall for balance. Slowly bend forward, keeping your knees a bit bent.
Let your arms hang down and relax your head and neck. Hold for 30 seconds to a minute, breathing deeply. You can use a strap or towel around your thighs for extra support.
Wall Slides for Back Alignment
Wall slides are simple but effective for posture and back pain. Stand with your back against the wall and feet shoulder-width apart. Slowly slide your back down the wall, keeping your shoulders and hips in contact.
Then, slowly stand up, keeping in touch with the wall. Repeat 10-15 times. This strengthens your back and helps your spine stay aligned.
Chair-Based Stretches for Workplace Relief
Chair-based stretches are great for desk workers. Sit with your feet flat on the floor. Interlace your fingers behind your back and lean back, stretching your chest and shoulders. Hold for 30 seconds.
Another stretch is to sit sideways in your chair and hold the back of the chair with both hands. Gently twist your torso in the direction you’re facing, then switch sides. These stretches ease the strain of sitting for long periods.
Stretch | Benefit | Duration |
Gentle Forward Folds | Stretches back, hips, and legs | 30 seconds to 1 minute |
Wall Slides | Improves posture and reduces back pain | 10-15 repetitions |
Chair-Based Stretches | Relieves strain from prolonged sitting | 30 seconds per stretch |
“You can do these stretches almost anytime, anywhere, in just a few minutes,” which makes them perfect for busy schedules or work breaks. By adding these stretches to our daily routine, we can greatly improve our recovery and back health.
Hamstring and Hip Flexor Release Techniques
Tight hamstrings and hip flexors can lead to lower back pain. Release techniques are key when you’ve hurt your lower back. Specific stretches and releases can help ease tension and aid in healing.
Lying Hamstring Stretches with Strap
Lying hamstring stretches target the back of your legs without straining your lower back. Here’s how to do it:
- Lie on your back with both legs straight.
- Loop a strap around the ball of one foot and gently pull your leg towards you, keeping your knee straight.
- Hold the stretch for 15-30 seconds and then release. Repeat on the other side.
This stretch lengthens the hamstring muscles, reducing tension that may be causing your lower back pain.
Kneeling Hip Flexor Releases
Hip flexors are also important when dealing with lower back strain. Kneeling hip flexor releases can ease tightness in the front of your hip.
To perform this release:
- Start in a kneeling position with one knee on the ground and the other foot in front of you.
- Slowly shift your weight forward, keeping your back straight, until you feel a stretch in the front of your hip.
- Hold for 15-30 seconds and then switch sides.
This exercise reduces tension in the hip flexors, which can help with lower back discomfort.
Piriformis and Glute Stretches
The piriformis muscle, deep in the buttocks, can also cause lower back pain when tight or inflamed. Stretching this area can offer relief.
To stretch your piriformis and glutes:
- Lie on your back with your affected leg crossed over your other leg.
- Gently pull your knee toward your opposite shoulder until you feel a stretch.
- Hold for 15-30 seconds and then release. Repeat on the other side.
This stretch alleviates tension in the piriformis and gluteal muscles, promoting comfort and reducing lower back strain.
By adding these hamstring and hip flexor release techniques to your routine, you can significantly improve your recovery from a thrown-out back and enhance your lower back health.
Gentle Core Activation for Stabilization
Gentle core activation is key for stabilizing the lower back after an injury. When we have a thrown out lower back, we might want to avoid moving. But, gentle movement and core activation can really help in recovery.
Pelvic Tilts and Bridges
Pelvic tilts are a simple yet effective exercise for engaging the core and relieving lower back tension. To do a pelvic tilt, lie on your back with your knees bent and feet flat on the floor. Tilt your pelvis upwards and then back down again, repeating for several repetitions. Bridges are also good, where you lift your hips towards the ceiling, squeezing your glutes and lower back muscles, and then lower back down.
Transverse Abdominis Engagement
The transverse abdominis muscle is the deepest abdominal muscle that wraps around the spine and pelvis. It’s important for core stability. To activate this muscle, lie on your back with your knees bent and feet flat on the floor. Place your hands on your abdomen and take a deep breath in. As you exhale, draw your navel towards your spine, feeling the muscle engage beneath your hands.
Bird Dog Progression for Core Stability
The bird dog exercise is a progression that challenges core stability and strength. Start on your hands and knees. Lift your right arm and left leg off the ground, holding them straight out. Hold this position for a few seconds, engaging your core to maintain stability. Then, lower back down and repeat on the other side. As you get more comfortable, you can increase the duration and repetitions.
By adding these gentle core activation techniques to your daily routine, you can improve your lower back’s stability and reduce pain. Start slowly and progress gradually to avoid making the injury worse.
Gradual Return to Daily Activities
Getting back to daily activities after a thrown out lower back is key. Start slow to avoid hurting your back again. “It’s natural to worry that you’ll hurt your back even more if you walk around,” says Medical Expert. But, moving gently can help your back heal.
Timeline for Activity Reintroduction
The time it takes to get back to normal depends on how bad the injury is. You can start with gentle movements in the first 24-48 hours. Here’s a basic plan:
- First 2-3 days: Start with gentle stretching and short walks.
- 3-7 days: Increase your walking and do simple tasks.
- 1-2 weeks: Move to harder activities, but avoid heavy lifting or bending.
Modifications for Common Daily Tasks
Changing how you do daily tasks can protect your lower back. Here are some tips:
- Lifting: Bend at the knees, keep the object close, and lift with your legs.
- Sitting: Use a chair with good back support or a pillow behind your back.
- Standing: Don’t stand for too long; take breaks to sit or walk.
Signs You’re Progressing Too Quickly
It’s important to listen to your body and know when you’re moving too fast. Watch for:
- Increased pain or discomfort
- Muscle spasms
- Numbness or tingling sensations
If you notice these signs, stop and rest. It’s safer to be careful and talk to a doctor if you’re not sure.
When to Seek Professional Medical Help
Many thrown out lower back cases can be treated at home. But, some need a doctor’s help. Knowing when to get help is key to avoid more harm and heal right.
Red Flag Symptoms Requiring Immediate Attention
Some symptoms mean you should see a doctor right away. These include:
- Severe pain that doesn’t get better with rest
- Numbness, tingling, or weakness in the legs
- Loss of bladder or bowel control
- High fever with back pain
- Recent back injury
Persistent Pain Beyond Expected Recovery Time
If your back pain lasts longer than a few weeks, see a doctor. Long-lasting pain might mean there’s something serious going on.
Barry Shafer says, “If your pain is sharp or lasts more than a few days, or if you feel weak or numb, see a doctor.” This shows why it’s important not to wait to see a doctor when pain doesn’t go away.
Professional Treatment Options
When you see a doctor for a thrown out lower back, they’ll look at your case. They might suggest:
- Physical therapy to make you more flexible and strong
- Medicines for pain and swelling
- Chiropractic care or osteopathic manipulation
- In some cases, surgery might be needed
A doctor will figure out the best treatment for you based on your situation.
Conclusion: Your Personalized Back Recovery Plan
Getting better from a thrown out lower back needs a full plan. It should include quick relief, gentle stretches, and slowly getting back to normal. Knowing what causes and shows acute lumbar strain helps make a personalized recovery plan.
Barry Shafer says, “Exercise is key to your health. Don’t let back pain stop you from staying active.” A good back recovery plan mixes gentle stretches, right breathing, and slow core work. This helps stabilize and back pain relief.
To really help a thrown out lower back, listen to your body and change your plan as needed. This might mean adjusting stretches, using props for support, and slowly adding back daily tasks. Being proactive and informed helps make a personalized recovery plan that meets your specific needs and aids in healing.
Following the advice in this article helps make a detailed plan to treat a thrown out lower back and get lasting back pain relief. We urge readers to be active in their recovery. Seek professional help when it’s needed and focus on your health and well-being.
FAQ
What is a thrown out lower back?
A thrown out lower back, also known as acute lumbar strain, is a common condition. It causes sudden and severe pain in the lower back. This pain is usually due to overstretching or tearing of the muscles and ligaments.
What are the common causes of throwing out your lower back?
Common causes include lifting heavy objects and sudden twisting or bending. Poor posture and muscle imbalances also play a role. These can strain the lower back muscles and ligaments.
How long does it take to recover from a thrown out lower back?
Recovery time varies. Most people recover in a few days to weeks with rest, stretching, and self-care. But, some cases may need medical attention if the pain doesn’t get better or gets worse.
What are the best stretches to do when you throw your back out?
Gentle stretches like knee-to-chest stretches and cat-cow movements help. Pelvic tilts are also good. It’s important to adjust stretches based on your pain level and avoid any stretches that make it worse.
How do I know if I’m progressing too quickly in my recovery?
Signs you’re moving too fast include increased pain, numbness, tingling, or weakness in your lower back or legs. If you notice these symptoms, slow down and talk to a healthcare professional.
When should I seek professional medical help for a thrown out lower back?
Seek medical help right away if you have severe pain, numbness, tingling, or weakness in your legs. Also, if your pain lasts longer than expected, get help.
What are some professional treatment options for a thrown out lower back?
Professional treatments include physical therapy, chiropractic care, and pain management. In some cases, surgery is needed. A healthcare professional will decide the best treatment for you based on your condition.
How can I prevent throwing out my lower back in the future?
To prevent future episodes, maintain good posture and exercise regularly. Strengthen your core and back muscles. Use proper lifting techniques. Stretching and flexibility exercises daily can also help.
Can I continue with my daily activities if I’ve thrown out my lower back?
It’s important to modify your daily activities to avoid making it worse. Gradually return to normal activities by following a timeline. Make changes to tasks to reduce strain on your lower back.
How do I create a personalized back recovery plan?
To create a personalized plan, consult with a healthcare professional. They will help determine the cause of your condition. Then, they’ll develop a plan with stretching, strengthening, and lifestyle changes to help you heal and prevent future episodes.
References
National Center for Biotechnology Information. Evidence-Based Medical Guidance. Retrieved from https://www.ncbi.nlm.nih.gov/pmc/articles/PMC8801838/


 Departments
 Related Videos
 Our Doctors
 News
News


