
Thumb injuries and conditions can make everyday tasks hard. At Liv Hospital, we specialize in thumb physical therapy. We help patients move better and feel less pain with special exercises thumb strengthening exercises.
Studies show that thumb strengthening exercises help a lot. They improve movement, lessen pain, and make thumbs work better again. This is true for thumb injuries and conditions like arthritis.
We use the best rehab methods and care for each patient. Our goal is to help thumb injury patients get better. We also support international patients looking for top-notch medical care.
Key Takeaways
- Thumb physical therapy is key for better movement and less pain.
- Special exercises can make thumbs work better and hurt less.
- Liv Hospital offers full support for patients from abroad.
- We use proven rehab methods for the best results.
- Putting patients first is what we do best.
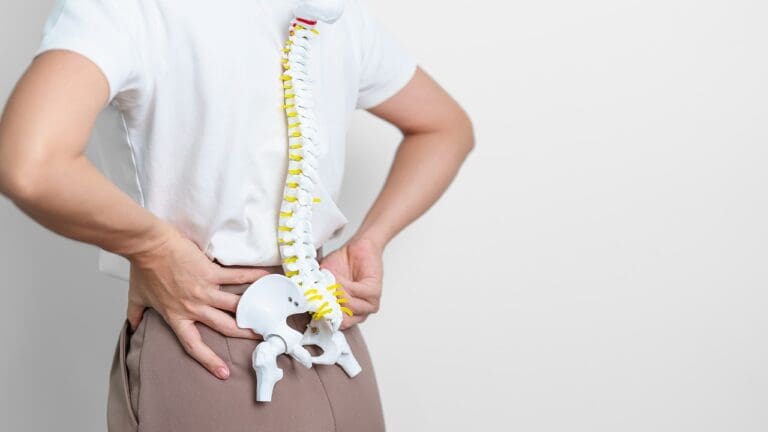
Understanding Thumb Injuries and the Need for Rehabilitation

It’s key to know about thumb injuries for good recovery. These injuries can make simple tasks hard. So, getting better is very important.
Common Thumb Conditions: Arthritis, Trigger Thumb, and Injuries
The thumb can get hurt in many ways. Arthritis and trigger thumb are common problems. They cause pain and make it hard to move your thumb.
Injuries like fractures or sprains also hurt thumb function. Early treatment with exercises can help a lot. This is true for arthritis and trigger thumb.
Impact of Thumb Dysfunction on Daily Activities
Thumb problems can make everyday tasks hard. Things like grasping objects and writing become tough. It can also make you feel less independent.
The thumb’s ability to touch other fingers is key. Without it, doing fine tasks is hard. This shows why thumb rehab is so important.
When to Start Physical Therapy for Your Thumb
Start physical therapy early after a thumb injury. It helps avoid lasting damage. Physical therapy includes exercises for your specific injury.
See a doctor to figure out when to start therapy. They’ll tell you the best exercises for you.
The Science Behind Effective Thumb Strengthening Exercises

Knowing how the thumb works is key to making exercises that strengthen it. The thumb is complex, allowing for both fine movements and strong grips. It has bones, joints, muscles, and tendons that all work together.
Thumb Anatomy and Biomechanics
The thumb can touch other fingers, thanks to its special anatomy. The carpometacarpal (CMC) joint, where arthritis often occurs, is a big part of this. The thumb’s design balances movement and strength, making it great for gripping and fine tasks.
The muscles and tendons of the thumb are vital for its function. The thenar muscles control thumb movements. Knowing how these parts work together helps create better exercises for strengthening the thumb.
Research-Backed Benefits of Thumb Rehabilitation
Studies show that thumb rehab can greatly improve hand function. Progressive resistance exercises, in particular, boost thumb strength and dexterity. These exercises make the thumb muscles stronger over time.
Thumb rehab does more than just strengthen the thumb. It can also reduce pain and improve grip. It helps people with thumb problems do daily tasks better. Rehab tackles the root causes of thumb issues, making a big difference in daily life.
How Progressive Resistance Improves Thumb Function
Progressive resistance exercises are key for thumb rehab. They make the thumb muscles stronger by gradually increasing the challenge. This helps the thumb work better and improves hand function.
There are many ways to use progressive resistance in thumb exercises. You can use resistance bands, therapy putty, or special equipment. The goal is to start with a level that’s right for you and then make it harder as you get stronger. This keeps the muscles challenged and helps them get stronger.
Preparing for Your Thumb Rehabilitation Journey
Getting ready for thumb rehab involves several important steps. Knowing what equipment you need for home exercises, understanding what to expect, and talking to healthcare experts are key. These steps help make your rehab journey better.
Essential Equipment for Home Exercises
Having the right tools is vital for thumb rehab. You’ll need:
- Therapy putty to strengthen and improve thumb dexterity
- Resistance bands to boost thumb mobility and strength
- Thumb exercisers or grip strengtheners for focused thumb workouts
Getting these tools lets you do your exercises right at home. This makes your rehab more effective.
Setting Realistic Recovery Expectations
Recovery times for thumb injuries or conditions vary a lot. Things like how bad the injury is, your overall health, and sticking to your rehab plan affect how long it takes to get better.
Being patient is key. Thumb rehab takes time. Setting realistic goals helps keep you motivated and improves your chances of success.
Consulting with Healthcare Professionals
Before starting any rehab, seeing healthcare experts is a must. They can give you a proper diagnosis, suggest the right exercises, and check on your progress.
Leaflets for patients stress the need for expert advice. This ensures you do exercises right and safely, avoiding more harm.
By taking these steps and working with healthcare pros, you can make a rehab plan that fits you. This will help improve your recovery journey.
Exercise #1: Therapy Putty Pinch and Roll
The Therapy Putty Pinch and Roll exercise is key for thumb rehab. It’s simple yet very effective. It helps those with thumb injuries, arthritis, or trigger thumb.
Step-by-Step Technique Guide
To do the Therapy Putty Pinch and Roll right, follow these steps:
- Start with a small piece of therapy putty between your thumb and index finger.
- Pinch it gently but firmly, making sure your thumb is working.
- Roll the putty between your thumb and index finger, keeping the pressure light.
- Keep doing this for the number of times you’re told to.
Recommended Resistance Levels and Progression
Choose the putty’s resistance based on your thumb’s strength and comfort. Start with soft putty and move to firmer as you get stronger.
|
Resistance Level |
Putty Firmness |
Recommended For |
|---|---|---|
|
Low |
Soft |
At the start of rehab or for mild thumb issues |
|
Medium |
Moderate |
When your thumb strength is improving |
|
High |
Firm |
For advanced strengthening |
Modifications for Different Conditions
If you have severe thumb arthritis or pain, start with a very light pinch. Slowly get firmer. For trigger thumb, move slowly to avoid pain.
Tips for Effective Exercise: Do the exercise comfortably, with your hand supported. Practice regularly and increase the challenge slowly for the best results.
Exercise #2: Resistance Band Thumb Abduction
Resistance band exercises are key for thumb rehab. The Resistance Band Thumb Abduction targets important thumb muscles. These muscles help with thumb movement and stability.
Proper Positioning and Movement Pattern
To do the Resistance Band Thumb Abduction right, tie the band to something at shoulder height. Hold the other end with your affected hand, thumb up. Your hand should be neutral, wrist straight, and forearm supported.
Slowly move your thumb away from your index finger. Keep the rest of your hand steady. This movement should be smooth and controlled.
Proper technique is key to avoid injury and get the most from the exercise. Practice in front of a mirror to check your form.
Sets, Repetitions, and Hold Duration
For best results, do 3 sets of 10-15 reps. Hold the thumb up for 2-3 seconds before going back. As you get stronger, you can do more sets and reps, and use a harder band.
Progressive resistance is important for strengthening your thumb muscles. Gradually making the exercise harder will improve your thumb’s function and strength over time.
Common Mistakes to Avoid
One mistake is using too much resistance, which can hurt your form and cause injury. Another is moving your wrist or forearm, which strains these joints. To avoid these, focus on just moving your thumb and keep your motion steady and controlled.
- Using excessive resistance
- Moving the wrist or forearm
- Not maintaining a controlled motion
Knowing these common mistakes helps you do the Resistance Band Thumb Abduction safely and effectively. This maximizes its benefits for your thumb rehab.
Exercise #3: Thumb Opposition Training
Thumb opposition training is key for better hand function and dexterity. It focuses on the thumb’s opposition movement. This is vital for grasping and handling objects.
Touch-Each-Finger Technique
The touch-each-finger technique is a simple yet effective way to train your thumb. Start by touching your thumb’s tip to your index finger’s tip. Hold for a second, then release. Do this with each finger, from index to little finger.
Step-by-Step Guide:
- Touch thumb to index finger
- Hold for 1 second
- Release
- Repeat with middle, ring, and little fingers
Adding Resistance for Advanced Training
To level up your thumb opposition training, add resistance. Use a small rubber band or a thumb opposition exerciser. Wrap the rubber band around your thumb and the finger you’re touching. This will give you resistance as you touch.
Benefits of Adding Resistance:
- Increased strength
- Improved muscle endurance
- Enhanced dexterity
Benefits for Precision Grip and Dexterity
Thumb opposition training boosts precision grip and dexterity. Strengthening the muscles involved helps with daily tasks. You’ll find it easier to do things like buttoning, zipping, and writing.
|
Benefits |
Description |
|---|---|
|
Precision Grip |
Improved ability to grasp small objects |
|
Dexterity |
Enhanced coordination and fine motor skills |
|
Daily Activities |
Easier performance of tasks like buttoning, zipping, and writing |
Exercise #4: Isometric Thumb Strengthening
Isometric thumb strengthening exercises are great for those recovering from thumb injuries. They help strengthen thumb muscles without moving the joint. This makes them perfect for early rehab or for those with severe injuries.
Wall Press and Table Press Variations
There are different ways to do isometric thumb strengthening, like wall press and table press. For a wall press, put your thumb against a wall and press hard for a few seconds. A table press involves placing your thumb under a table and pushing up.
Wall Press Technique: Stand with your back to the wall and put your thumb against it. Press your thumb into the wall for 5-10 seconds, then let go. Do this for 3 sets.
Table Press Technique: Sit with your hand under a sturdy table, thumb up. Press your thumb against the table’s underside for 5-10 seconds, then release. Repeat for 3 sets.
Optimal Hold Times and Frequency
The best hold time for these exercises is 5 to 10 seconds. Start with shorter times and increase as your thumb gets stronger. Do these exercises 3-4 times a day for the best results.
|
Exercise |
Hold Time |
Frequency |
|---|---|---|
|
Wall Press |
5-10 seconds |
3 sets, 3-4 times a day |
|
Table Press |
5-10 seconds |
3 sets, 3-4 times a day |
Progressive Intensity Methods
To make these exercises harder, increase the hold time or the number of reps. You can also use a resistance band to add more resistance.
For example, loop a resistance band around your thumb and a stable object. Press your thumb against the band to work against its resistance. This increases the exercise’s intensity.
Additional Thumb Strengthening Exercises for Complete Rehabilitation
To fully recover your thumb, you need to do different exercises. These will boost your thumb’s strength, flexibility, and function.
Exercise #5: Thumb Range of Motion Circles
Thumb range of motion circles are great for keeping your thumb mobile. Move your thumb in circles, first clockwise and then counterclockwise. Start with small circles and make them bigger as you get more comfortable.
Benefits: This exercise makes your thumb more flexible and less stiff.
Tip: Do this exercise often, like after resting or when your thumb is not moving.
Exercise #6: Grip and Release with Stress Ball
Gripping and releasing a stress ball strengthens your thumb and hand. Hold the stress ball tight for a few seconds, then let it go. Do this a few times.
Benefits: It makes your thumb and hand muscles stronger, improving your grip.
- Squeeze the stress ball for 5 seconds
- Release for 5 seconds
- Repeat for 10-15 repetitions
Exercise #7: Finger Walking for Thumb Mobility
Finger walking helps your thumb move better and be more flexible. Place your hand flat on a table with fingers together. Slowly move your fingers away from your thumb, stretching the space between your thumb and index finger.
Benefits: This exercise improves your thumb’s mobility and flexibility.
|
Exercise |
Benefits |
Frequency |
|---|---|---|
|
Thumb Range of Motion Circles |
Enhances thumb flexibility and reduces stiffness |
Several times a day |
|
Grip and Release with Stress Ball |
Strengthens thumb and hand muscles, improving grip strength |
3 sets of 10-15 repetitions |
|
Finger Walking for Thumb Mobility |
Enhances thumb mobility and flexibility |
3 sets of 5-10 repetitions |
Conclusion: Building Your Personalized Thumb Rehabilitation Program
Creating a customized thumb rehab program is key to getting better. We’ve looked at exercises like Therapy Putty Pinch and Roll, and Thumb Opposition Training. These can really help your thumb work better and feel less painful.
Having a plan made just for you, with help from health experts, is important. It meets your specific needs and conditions. By using the exercises and tips from this article, you can make a program that fits you perfectly.
We suggest working with your healthcare team to make a plan that’s just right for you. This way, you can get your thumb to work its best, feel less pain, and move your hand better.
FAQ
What are the most effective thumb strengthening exercises for physical therapy?
We suggest several exercises. These include Therapy Putty Pinch and Roll, and Resistance Band Thumb Abduction. Also, Thumb Opposition Training, Isometric Thumb Strengthening, and Thumb Range of Motion Circles are good. Grip and Release with Stress Ball and Finger Walking for Thumb Mobility are also beneficial.
How do I prepare for thumb rehabilitation?
To get ready for thumb rehab, gather the right tools like therapy putty and resistance bands. Set realistic goals for recovery. Also, talk to healthcare experts to create a plan just for you.
What are the benefits of progressive resistance exercises for thumb rehabilitation?
These exercises boost thumb function and hand strength. They also reduce pain and improve dexterity. This helps you do daily tasks more easily.
Can I perform thumb strengthening exercises if I have a trigger thumb condition?
Yes, but adjust the exercises to fit your condition. Always check with a healthcare pro to find the right exercises and changes for you.
How often should I perform thumb strengthening exercises?
How often depends on the exercise and your condition. Start slow and increase as your thumb gets stronger.
Are there any common mistakes to avoid when performing thumb strengthening exercises?
Yes, avoid using too much resistance and doing exercises wrong. Also, don’t ignore pain signals. Work with a healthcare pro to do them right.
Can thumb strengthening exercises help with arthritis?
Yes, they can ease arthritis symptoms. They improve mobility, reduce pain, and increase strength. This helps with hand function and quality of life.
How long does it take to see results from thumb strengthening exercises?
Results vary based on individual, condition, and exercise routine. Be patient and keep at it. Noticeable improvements can take weeks to months.
Are there any additional resources available for thumb rehabilitation?
Yes, see healthcare pros like physical therapists for a tailored plan. Also, look for trusted online resources for more help and support.
Reference
National Center for Biotechnology Information. Thumb Exercises for Physical Therapy: Strengthening and Pain Reduction. Retrieved fromhttps://pmc.ncbi.nlm.nih.gov/articles/PMC10584067/


